

GardenerHeaven.com is reader-supported. When you buy through links on our site, we may earn an affiliate commission.

When winter comes, you can take a reprieve that you at least do not have to mow the lawn. When retiring your lawnmower, it is important to take the necessary steps to winterize it. This entails making sure the lawnmower is in top condition throughout winter so that it can work just as well when spring comes along and the lawn blooms once again.
The two main components in the winterization process are cleaning the deck and stabilizing the fuel if running a gas-powered mower or removing the battery if the mower is battery-operated. Though these two are not the only steps in this process, they are the most impactful.
This article will break down some of the actions to take to make sure your lawnmower will work just as great when it comes into use in the spring.
Step 1: Empty the Gas Tank
This applies to gas-powered lawn mowers. Leftover gasoline in the tank of the mower, when left through the entire winter season can get stale and ends up gumming the carburetor. It can create favorable conditions for rust to develop. Here is how you empty the lawnmower:
- You should put a fuel stabilizer in the tank. Proceed to move the mower to ensure the stabilizer is spread out throughout the entire system.
- Turn off the mower and allow for the engine to cool off. Proceed by siphoning off the excess gasoline into a clean container. This gas can be used in your vehicle or for other purposes, provided it has not been mixed with anything else.
- Restart the land mower and keep it running until it completely gives out. Repeat the process until the mower can no longer start and the lines are completely emptied.
For electric lawnmowers, the objective would be to remove the battery and place it in a cool and dry place. After the winter, you can just put it back in and the machine will roar to life as it has always done before.
Step 2: Disconnect the Spark Plug
This is very important in injury prevention. Remove the spark plug before proceeding to the next available steps as having it in could cause it to kick-start accidentally. This could cause major injury to the people maintaining it.
Step 3: Remove the Blade
The objective is to change the oil and clean the underside of the machine. In this, the first step is to detach the blade. This is done by unscrewing the bolts that hold it to the rest of the mower. It is important to keep up with safety standards at all times when dealing with the mower. As such, you should have thick gloves throughout the entirety of this process.
After you remove the blade, you should take the opportunity to sharpen it and even oil it. This will make sure as spring approaches the lawn mower will be in the best possible shape while extending the machine’s longevity.
Step 4: Have an Oil Drain
With 4-cycle engines, you will have to change the oil. With some 2-cycle engines, the oil is combined with the fuel which eliminates the need as the oil will be drained alongside the gas in step one. You should have a waterproof fabric under the machine to capture any of the oil that might drip into the ground.
Ensure you have the mower sideways. This will ensure the carburetor along with the air filters will both be facing up so they do not collect any oil or gas spillage on them.
Next, proceed by removing the reservoir cap and slowly angle the mower until the oil drips out through gravity to the drainage pan. Once all the oil has been drained, put back the oil reservoir.
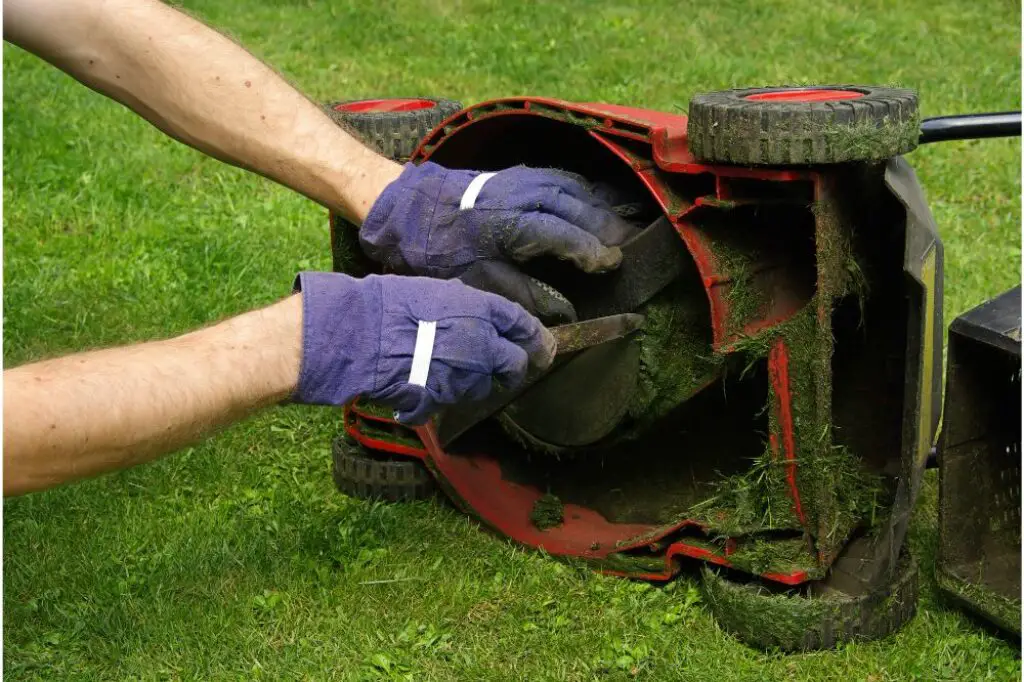
Step 5: Clean the Underside
Use a wire brush to remove all the grass, mud, and gunk that has found a home under your mower. This will help remove all the rust as well as clear any discharge from the chute which will then allow the aerodynamics of the deck to work as it was intended. Once the underside is cleaned, reattach the waxed and sharpened blade.
Once completed, turn the mower on the right side up and refill the lubrication tank with fresh 30-weight oil. You can recycle the used oil at a gas station. Make sure the oil you use is not heavier than 10W-40.
Step 6: Change the Oil Filter
In case the mower utilizes a paper filter make sure you replace it; on the other hand, if it uses sponge filters soaked in oil, take it out, wash it, let it dry out, add a bit of oil in it, and put it back in the machine. Remove all the dirt from the cooling fans with a screwdriver.
Step 7: Change the Spark Plug
With a socket wrench, remove the spark plug while making sure to protect its porcelain casing. Even if the spark plug still works, for a few bucks you can get a newer one that will perform a lot better.
Conclusion
This is a comprehensive guide to caring for your lawnmower to ensure it still works after the winter season. This will save you a lot in repair costs in the future while making sure you get the most from your machine.
Throughout this entire process, it is important to always keep safety in mind. Make sure you take all the necessary precautions to not injure yourself.

