

GardenerHeaven.com is reader-supported. When you buy through links on our site, we may earn an affiliate commission.
.jpg)
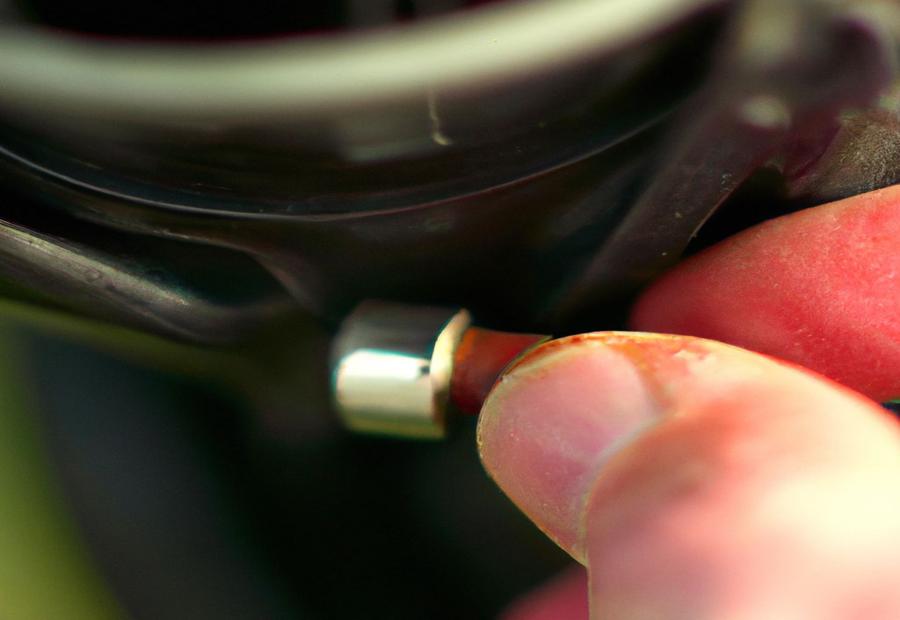
Photo Credits: Gardenerheaven.Com by Samuel Mitchell
Having trouble starting your riding lawn mower? Don’t worry, we’ve got you covered! In this section, we’ll cover the common issues that can prevent your mower from starting and provide you with quick and effective fixes. From the frustration of a non-starting mower to the importance of proper maintenance, we’ll give you the insights you need to get your mower up and running again in no time. So, let’s dive in and tackle those common issues head-on!
Frustrating Experience with a Non-Starting Mower
It’s so annoying when a riding lawn mower won’t start! Luckily, there are a few simple fixes. One possible cause is the carburetor choke. Check and change it. The carburetor filter might be clogged, too. Clean or replace it. Also, make sure you remove the heavy shroud before attempting to start the mower. This helps it run smoothly.
Air filters are important, too. Regularly clean and replace them for optimal engine performance. An overheated engine can stop it from starting. Identify the source and fix it promptly. Contaminated gas? Drain and replace it. Spark plug faulty? Check and replace it.
Lastly, technique with the engine choke is key. Master it for successful starts. So, to sum up, don’t despair if your riding lawn mower won’t start. By addressing the above issues, you can get it running quickly.
Importance of Proper Maintenance
Maintaining your riding lawn mower is essential for smooth operation and long life. Regular upkeep prevents breakdowns and non-starting problems.
- Check and clean the carburetor choke.
- Clean or replace the carburetor filter.
- Remove any heavy shrouds that may hinder starting.
- Make sure the air filter is clean.
- Address overheating issues.
Pay attention to clogged mufflers or bad gas. Check and replace the spark plug. Use the correct engine choke technique. Troubleshoot hot starting and faulty spark plugs.
- Replace the fuel filter.
- Check the fuel tank and cap.
- Clear debris from the mowing deck.
- Handle field grass properly.
Clean and replace air filters. Maintain cooling fins. Use correct spark plug installation techniques.
Properly maintaining your riding lawn mower is key in avoiding non-starting issues. Following these guidelines can improve performance and reliability. This minimizes downtime due to start-up problems.
Quick Fixes for a Riding Lawn Mower that Won’t Start
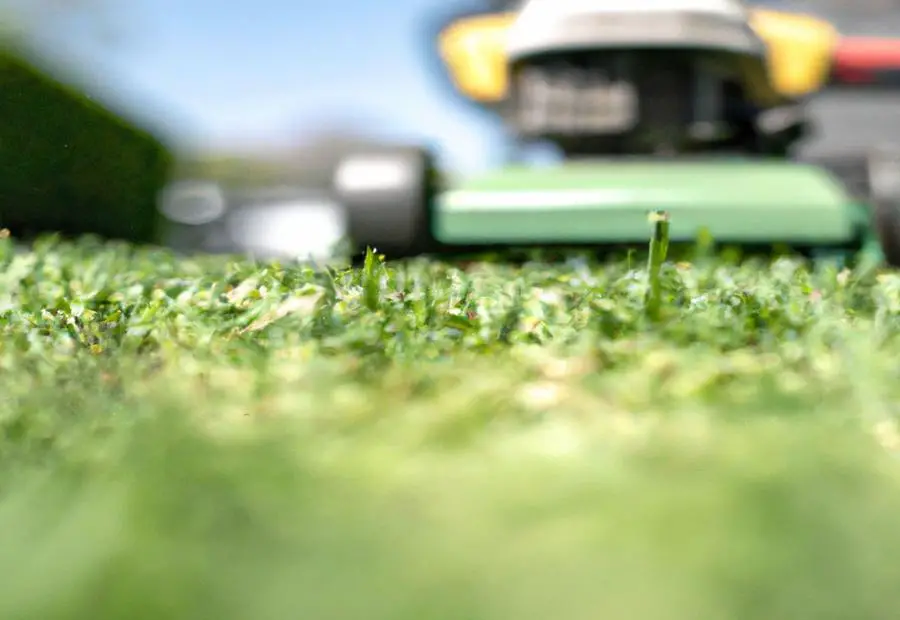
Photo Credits: Gardenerheaven.Com by Jordan Hall
If your riding lawn mower is refusing to start, don’t worry! In this section, we’ll cover quick fixes that can get your mower up and running again in no time. From checking the carburetor choke to ensuring the heavy shroud is removed, we’ve got you covered. With practical tips and easy-to-follow steps, you’ll be back to mowing your lawn smoothly in no time!
Check the Carburetor Choke
The carburetor choke of a riding lawn mower is essential. Check it when the mower won’t start. This choke controls the amount of air and fuel mixture entering the engine during startup.
To check the carburetor choke:
- Find the choke lever on the mower’s carburetor. Ensure it’s in the correct position – “choke” or “start”.
- Move the choke lever back and forth. It needs to move freely. If it’s stuck, this may cause starting issues.
- Clean or replace if dirty or corroded. Lubricate any moving parts.
- Check your mower’s manual for instructions on checking and adjusting the carburetor choke.
This ensures efficient combustion and ignition, allowing the engine to start. But why not forget all that and let your riding lawn mower enjoy its clogged-up diet?
Clean or Replace the Carburetor Filter
A clean, or replaced, carburetor filter is necessary for a riding lawn mower to work properly. It keeps the engine’s performance up by filtering out dirt, debris and other stuff from the fuel. Not cleaning or replacing the carburetor filter can lead to poor performance, bad fuel efficiency and potential harm to the mower.
Follow these steps to clean or replace the carburetor filter:
- Find the carburetor filter housing on your riding lawn mower.
- Take off any screws or clips securing the housing and open it.
- Remove the old filter from the housing carefully.
- Check the filter for any damage or blockage. If it looks dirty or worn, replace it.
- To clean, lightly tap the filter against a hard surface to remove dirt or debris.
- For replacement, put in a new filter into the housing and secure it with clips or screws.
Keeping a clean or replaced carburetor filter is important for optimal engine performance and length of life. A blocked or dirty filter can restrict fuel to the engine, resulting in starting issues and reduced power output.
Regularly inspecting and cleaning/replacing the carburetor filter makes sure only clean fuel reaches the engine, preventing damage from debris. This easy maintenance task can save you time and money by stopping expensive repairs later on.
By doing this important maintenance task, you have a better chance of getting your riding lawn mower running well again when you experience starting issues.
Ensure the Heavy Shroud is Removed
The heavy shroud refers to a part of the riding lawn mower that needs to be taken off. Doing this gives you access to components that may need attention or repair.
To make sure the heavy shroud is removed properly, follow these steps:
- Locate it: It’s usually on top of the engine. It offers protection and insulation. It can be secured with screws or bolts.
- Use the right tools: You’ll likely need a screwdriver or a wrench, based on the fasteners used. Get the correct size for best results.
- Remove with caution: Carefully loosen and remove the fasteners. Watch out for any wires or connections attached to the shroud. Disconnect them before removing it.
Note that you should only take off the heavy shroud if necessary. If you’re not sure how to do it safely, ask a professional or read the mower manual.
By following these steps, you can make sure the heavy shroud is taken off your mower correctly. This allows for easier access to components that might need maintenance or repair.
If issues persist even after taking off the heavy shroud, there could be other problems with your mower. Make sure to address all potential issues to get your mower back in working condition quickly and safely.
Check for a Clogged Air Filter
A clogged air filter can stop a riding lawn mower from beginning properly. Airflow is important for the engine to start and run well. If the air filter is clogged, it hinders the flow of air into the engine, causing it to struggle or not start at all.
Check for a Clogged Air Filter: 6 Step Guide!
- Switch off the riding lawn mower and disconnect the spark plug wire for safety.
- Find the air filter cover, usually on the engine’s top. It may have screws or clips.
- Take out the cover to access the air filter. Note how the old filter was placed before removing it.
- Check the air filter for dirt, debris, or heavy dust buildup. If it looks dirty or clogged, clean or replace it.
- To clean a foam or paper air filter, tap it against a hard surface to remove loose dirt. If it is clogged, wash it with warm water and mild detergent, and let it dry before reinstalling.
- For disposable filters, replace them if cleaning isn’t possible.
Keep in mind that regular maintenance includes inspecting and cleaning/replacing the air filter as necessary to make sure of proper airflow and perfect engine performance.
More details:
Neglecting air filter maintenance on your riding lawn mower can lead to reduced power output, less fuel efficiency, and even damage to your machine’s engine parts due to inadequate filtration. By frequently checking and fixing any related issues such as a clogged air filter quickly, you can enhance your lawn mower’s performance and prolong its life.
Funny Story:
Once upon a time, I noticed my riding lawn mower having trouble starting despite multiple attempts. Thinking about what I had learnt about common starting problems, I chose to search for a clogged air filter. Surprisingly, the air filter had lots of grass clippings and dirt. I carefully cleaned the filter, making sure it was dry before reinstalling. Voila! The mower started easily, showing the significance of regularly checking and maintaining the air filter to avoid starting issues.
An overheated engine is like a bad date – it’s all smoke and no action.
Identify and Address an Overheated Engine
Engine overheating is an annoying issue when operating a riding lawn mower. Identifying and addressing it will make sure the machine runs smoothly. Here’s a guide to do it:
- Check the coolant levels. Insufficient coolant can cause overheating. Make sure it’s enough and add more if needed.
- Look at the radiator. Clogs or damage can prevent cooling. Check for dirt, debris, or leaks. Clean or repair it.
- Make sure airflow is good. It’s key to keep the engine cool. Check for obstructions in front of the radiator or cooling fins. Remove them if found.
- Check the fan belt. A worn-out or loose one won’t let the fan rotate properly and cause overheating. Inspect it for signs of damage or slackness and replace if needed.
- Assess the thermostat. A malfunctioning one disrupts temperature regulation in the engine cooling system. Test it with a thermometer and replace if it won’t open at designated temperatures.
- Monitor usage patterns. Overworking the mower by mowing too much or operating in extreme heat can strain the engine, leading to overheating. Adjust mowing practices to avoid this.
To prevent overheating, follow regular maintenance like cleaning cooling fins, changing oil, and lubricating relevant parts according to manufacturer guidelines.
By doing so, mower operators will keep their machines protected from potential damage while maintaining optimal performance and efficiency. So, go unclog that muffler and let your mower roar!
Address a Clogged Muffler
Having a clogged muffler can be a common issue that prevents a riding lawn mower from starting. The muffler reduces engine noise and directs exhaust gases out of the machine. When blocked with debris or carbon buildup, it disrupts airflow and affects engine performance.
To clear a clogged muffler, follow these six steps:
- Turn off the mower and disconnect the spark plug wire for safety.
- Locate the muffler, usually on the side or back of the engine.
- Remove any visible debris or obstructions from the exterior of the muffler.
- Use a wire brush to clean away any carbon buildup on the interior surface.
- If the clog persists, use compressed air to blow through the muffler and remove obstructions. Be careful not to damage any sensitive parts.
- Reattach the muffler securely and reconnect the spark plug wire.
Remember to clean both the exterior and interior of the muffler when addressing a clogged muffler. This will help prevent future clogs and improve its overall performance. Moreover, regular maintenance of your riding lawn mower’s muffler will extend its lifespan.
Contaminated gas? Your mower must be attracting all the wrong types!
Address Contaminated Gas
Contaminated gas can be a nuisance when trying to get your riding lawn mower running. To tackle this problem, it is important to take action! Contaminated gas is fuel that has been contaminated with impurities or debris. This can occur due to many causes such as storing the mower with old fuel, using a low-quality fuel source, or having water or dirt in the tank.
To address contaminated gas, here are a few steps you can take:
- Drain the remaining fuel from the tank and replace it with fresh gasoline.
- Clean or replace the fuel filter.
- Inspect the fuel lines for blockages.
- Using a fuel stabilizer regularly can help prevent this issue, as it keeps the fuel clean.
Besides, make sure to maintain the mower’s fuel system by:
- Checking and cleaning the fuel cap.
- Treating the gas with the right additives.
These steps will keep your riding lawn mower in top condition.
Spark plugs are small, yet essential, fire starters. With proper care, they’ll help your relationship with your riding lawn mower remain strong!
Check and Replace the Spark Plug
Time to spark up your lawn mower! An essential ignition system component, the spark plug provides the spark that lights the fuel-air mix in the engine. So, it’s important to check & replace the spark plug for proper combustion and mower performance.
Here are the steps to replace the spark plug:
- Turn off the mower, and let it cool.
- Locate the spark plug wire, connected to the spark plug. Gently disconnect the wire by gripping the rubber boot and pulling it off.
- Use a spark plug socket wrench to loosen & remove the old spark plug. Inspect it for wear or damage, like a worn electrode or cracked insulator. If needed, replace with a new one that matches mower specs.
- Apply anti-seize compound to ⅜ inch of thread at its base before screwing it back in.
Maintaining spark plug health helps with engine performance and prevents starting issues. Master the art of choking the engine properly, and watch your mower come to life!
Use Proper Engine Choke Technique
For proper engine choke usage on a riding lawn mower, you must know the essential technique. This will help the machine start and run smoothly.
- Find the choke lever or knob near the engine. It’ll either have “choke” labeled or a symbol.
- Set the throttle lever/control as per manufacturer’s guidelines.
- When starting a cold engine, put the choke lever/knob in “Choke” position. This restricts airflow and enriches the air-fuel mixture, so the engine is easier to start.
- Gradually move the lever/knob towards “Run” as it warms up. This lets more air in the carburetor and adjusts the fuel-air mixture for optimum running.
- If it has an automatic choke system, follow the manufacturer’s instructions.
- Refer to the owner’s manual for choke mechanism specific to your mower.
Using proper engine choke technique avoids potential issues and keeps the mower running smoothly.
Troubleshooting Tips for Specific Problems
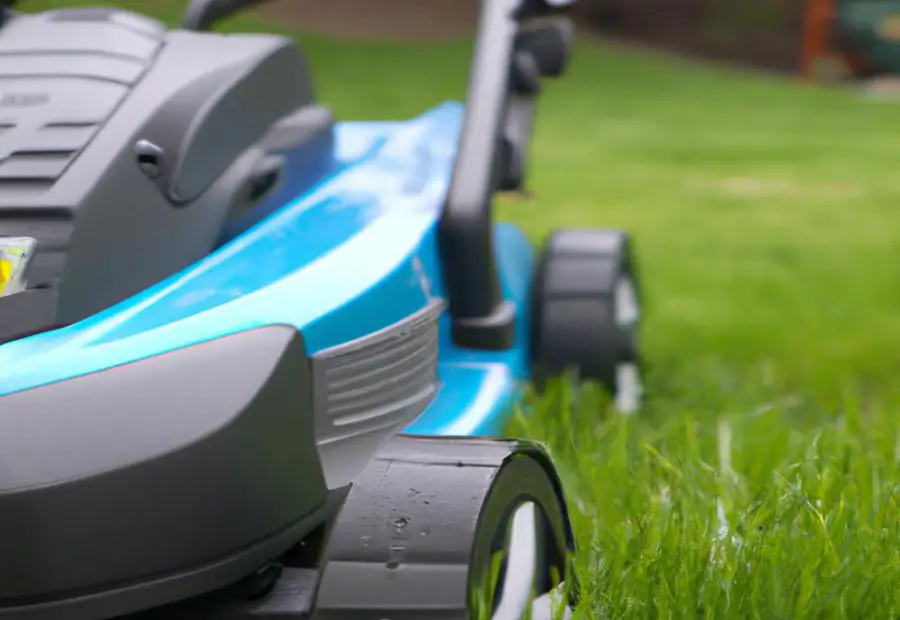
Photo Credits: Gardenerheaven.Com by Joseph Carter
When your riding lawn mower refuses to start, it’s essential to know the specific troubleshooting tips to address the problem swiftly. From handling hot starting issues to replacing a faulty spark plug, this section will provide you with a comprehensive guide to fix various common problems that can hinder your mower’s performance. By following these quick fixes, you’ll save time and frustration, ensuring your riding lawn mower gets up and running smoothly again.
Address a Hot Starting Problem
A hot starting problem is a common issue that can frustrate riding lawn mower users. To address it, five steps must be taken:
- Let the engine cool down.
- Check the fuel system for clogs and blockages.
- Clean or replace the spark plug.
- Adjust the carburetor settings.
- Maintain proper cooling.
It’s important to read the mower’s manual and seek professional help if the issue persists. Regular maintenance and servicing will ensure a reliable mower. Stabilize the fuel for a smoother ride!
Use a Fuel Stabilizer
Fuel stabilizers can be a great help in keeping your riding lawn mower running optimally. They prevent fuel from degrading and keep it fresh for longer. This ensures smooth starting and efficient running. Here’s how to use them:
- Step 1: Choose the right stabilizer: Look for a high-quality stabilizer designed for small engines like those found in riding lawn mowers. Make sure it works for both ethanol and non-ethanol fuels.
- Step 2: Add the stabilizer: Measure the correct amount according to the product label. Pour it into your mower’s gas tank before refueling. Follow the recommended mixing ratio.
- Step 3: Run the engine: Start your lawn mower and let it run for several minutes. Then, the stabilized fuel mixture will circulate through the engine and carburetor, avoiding any issues due to fuel degradation.
Also, regular use of a fuel stabilizer can prevent moisture buildup in your mower’s fuel system. This can result in corrosion and other internal damages. So, including this simple practice in your maintenance routine can improve your mower’s reliability and efficiency.
There are many different types of fuel stabilizers on the market. Each has unique features and benefits. Some are for outdoor power equipment like riding lawn mowers. Others may have additives or properties that enhance engine performance or reduce emissions. Research or ask an expert to find out the best fuel stabilizer for your needs and mower model.
Mark, an avid gardening enthusiast, had been battling starting issues. He found out that fuel degradation was partly to blame. After researching the benefits of using a fuel stabilizer, he decided to give it a try. He followed the instructions and added the stabilizer to his mower’s tank before refueling. To his delight, he noticed significant improvement in the starting performance. The mower started without a hitch and Mark now religiously uses a fuel stabilizer. This ensures that his mower remains reliable and ready for action.
Don’t let a faulty spark plug ruin your mowing party – use fuel stabilizers!
Address a Faulty Spark Plug
A faulty spark plug can cause a riding lawn mower starting issue. Solve it fast for smooth operation. Three steps to address this:
- Remove the Plug – Disconnect the wire to it. Use a socket wrench or spark plug socket. Inspect the spark plug for damage or wear.
- Clean or Replace – Clean if just dirty. Replace if significantly damaged or worn out.
- Install and Test the New Spark Plug – Install, reconnect the wire, attempt to start the mower, and ensure it runs smoothly.
Regularly inspect and maintain spark plugs. This maintenance task should be part of regular preventive care. Address faulty spark plugs and follow procedures to avoid future starting problems. Solve mower issues with the right solutions.
Identify and Address More Problems
Your riding lawn mower may have extra issues that must be noticed and solved before it can start. By analyzing these issues, you can confirm your mower works great and is ready for lawn care.
Check out these action steps:
- View battery connections for corrosion or weak connections. Clean or secure them if needed.
- Evaluate the ignition switch to make sure it’s running correctly. A broken switch could stop the mower from starting.
- Look at the wiring harness for any harm or loose connections. Repair or change any damaged pieces as needed.
- Test the safety switches, like the seat switch, blade engagement switch, and clutch pedal switch, to make sure they are functioning properly. Defective safety switches can stop the mower from starting.
- Inspect the starter solenoid for any signs of damage or wear. Replace it if needed.
- Inspect the fuel lines for any cracks or clogs. Clean or replace them as needed.
These troubleshooting actions will help you identify and address any additional problems that may be blocking your riding lawn mower from starting. By following a systematic strategy to diagnosing and fixing these issues, you can get your mower back in working condition without spending extra time and money on expert help.
A pro tip for knowing and dealing with more problems with your riding lawn mower is to check the owner’s manual for specific troubleshooting guidelines. The manual will provide thorough information on usual problems and their solutions, helping you manage any complicated problems you may experience.
Plus, don’t forget the safety release mechanism cable. It’s there to keep your lawn mower safe!
Check the Safety Release Mechanism Cable
To check the safety release cable, follow these steps:
- Find it: Look for a handle or lever near the seat, connected to a cable.
- Check the tension: Make sure it’s not too loose or slack. Adjust it if needed.
- Test it: Sit on the mower and start it. When you lift off the seat, the blades should stop spinning.
- Inspect for damage: Look for wear, fraying, or other damage. Replace the cable if needed.
Remember to check other parts too, like the carburetor choke, air filter, and spark plug. This keeps your mower safe and running smoothly.
Inspect and Replace the Fuel Filter
Inspecting and replacing the fuel filter is vital. Don’t ignore it when troubleshooting your riding lawn mower. Regularly check the filter for signs of damage or clogging. Here’s a guide:
- Find the filter. It’s usually between the fuel tank and the carburetor.
- Disconnect both ends of the fuel line connected to it. Empty any excess fuel before continuing.
- Inspect the filter for cracks or leaks. If it’s damaged, replace it right away.
- If not, remove it from its housing. Clean it using compressed air or a gentle solvent.
- Reassemble it into its housing. Connect both ends of the fuel line securely.
- Test the mower. Start it up and make sure it runs without any issues.
By inspecting and replacing the filter, you protect the engine’s fuel system from debris and contaminants. This ensures optimal performance and prolongs its lifespan.
Some riding lawn mowers have multiple filters. Check the owner’s manual or ask a professional for help to find them and replace them.
Regular maintenance prevents costly repairs. Make sure the fuel tank and cap are working properly.
Check the Fuel Tank and Fuel Cap
Keep your riding lawn mower running like a dream by checking the fuel tank and fuel cap regularly! Inspect the tank for any signs of damage or leaks, make sure the cap is tightly secured, and clean out the tank to remove dirt and contaminants. Also, using clean and high-quality gasoline can help prevent starting issues. Don’t forget to check other components like air filters and spark plugs too! With this regular maintenance, you’ll never have to worry about starting issues again.
Make sure you keep your lawn neat and tidy – don’t let your mowing deck become a playground for squirrels!
Clear the Mowing Deck of Clogged Debris
It’s essential to clear the mowing deck of any clogged debris to keep your riding lawn mower in good working condition. Follow these steps to stay safe:
- Turn off the mower and remove the key.
- Check for any grass clippings, leaves, or branches.
- Scrape away any loose debris with a brush or putty knife.
- Thoroughly clean with a high-pressure hose or leaf blower.
Remember to maintain and clean the underside of the mowing deck after each use. Doing so will give you optimal performance and extend your mower’s life.
Safety is key – always follow the manufacturer’s guidelines and instructions before performing maintenance. Don’t let grass run wild – take control!
Properly Handle Field Grass
For a reliable and efficient riding lawn mower, proper handling of field grass is key! Tangles in the mower blades can make them ineffective and damage the machine. Follow these techniques to ensure safe and efficient field grass handling.
- Check the mowing deck for grass clippings and debris regularly. Clearing away buildup will help prevent clogs and achieve optimal cutting performance.
- Do not mow wet or damp field grass. Clumping may lead to clogs in the mower deck. Wait for the grass to dry before mowing.
- When cutting thick or tall field grass, mow at a moderate speed. Going too fast can overwhelm the mower blades and cause damage.
- Adjust the mower’s height settings for uneven ground or rough terrain. This will prevent scalping of the grass and keep the machine running smoothly.
- Be vigilant for rocks, branches, or other objects that may be hidden in the field grass. These obstacles can damage the mower blades.
- After mowing, inspect and clean the mowing deck and blades. Removing residual grass clippings will help avoid rusting and extend their lifespan.
If you take proper precautions when handling field grass with a riding lawn mower, you can ensure that your mower runs efficiently and safely. Be aware of your surroundings, adjust the mower’s height settings, and mow at a moderate speed. Regularly inspect and clean the mower deck and blades. Following these steps will help your lawn mower remain in good condition and provide reliable service for years to come. Keep your riding lawn mower happy and your lawn will be happy too!
Preventive Maintenance for a Reliable Riding Lawn Mower
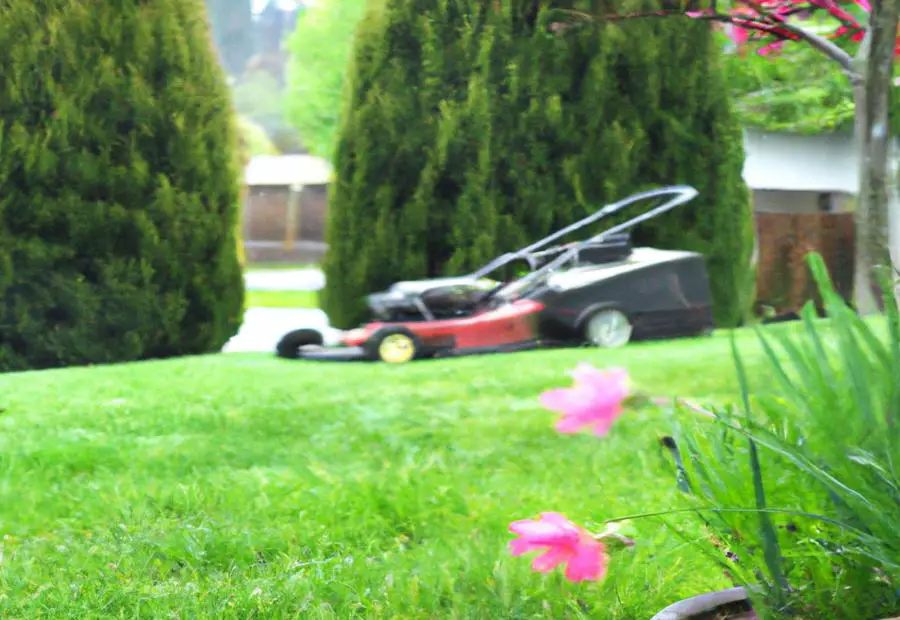
Photo Credits: Gardenerheaven.Com by Billy Walker
Preventive maintenance is key to ensuring a reliable riding lawn mower. Learn quick fixes and essential upkeep tasks in this section, such as regularly cleaning and replacing air filters, maintaining cooling fins, using correct spark plug installation, and proper lawn care equipment maintenance. Keep your mower running smoothly and your lawn looking pristine with these preventive measures.
Regularly Clean and Replace Air Filters
Air filters are key for a riding lawn mower. They keep the engine clean by filtering dirt and debris from the air. Cleaning and replacing them is a must. Here’s how:
- Find the air filter housing, usually close to the carburetor or fuel tank.
- Take out the old air filter carefully.
- Check for any damage or clogging. If it looks dirty or worn, replace it.
- Clean a reusable filter by tapping on a hard surface. Or, use compressed air to blow dirt away.
- Put the new or cleaned filter back into the housing. Make sure it’s secure. Close the housing tight.
Cleaning and replacing air filters helps prevent dirt and debris from reducing performance or causing damage. By doing this, you can keep your mower running smoothly and efficiently.
Also, when DIY remedies don’t work, professional help may be needed. To troubleshoot, know about common problems like hot starting issues, faulty spark plugs, clogged debris in mowing decks, and fuel system issues. Preventive maintenance practices like cleaning and replacing air filters can help.
Maintain Cooling Fins
The cooling fins of a riding lawn mower are essential for the engine’s optimal operation. Cleaning them regularly is key to keeping debris and dirt out. Inspect the fins and use compressed air or a brush to remove anything stuck. This enables proper airflow, making sure the engine stays cool.
Check for any damage such as bent or broken pieces. This can restrict airflow, leading to overheating. Replace any damaged fins for optimal performance.
When cleaning the fins, use a soft bristle brush. Avoid force or sharp objects that could harm the fragile fins.
Keep an eye on the engine temperature gauge while running the mower. High readings may show issues with the cooling system, such as clogged or damaged fins. If so, seek professional help to inspect and repair it.
Regularly cleaning and caring for the cooling fins ensures efficient heat dissipation and maximizes the engine’s performance and lifespan. It also prevents potential overheating issues and costly repairs.
Maintaining the mower’s cooling fins is essential for a reliable and efficient mowing experience.
Use the Correct Spark Plug Installation
Correct spark plug installation is key for a properly functioning riding lawn mower. Wrong installation can cause starting problems and other engine issues. Follow the right process to prevent complications. Here’s a step-by-step guide:
- Make sure the engine is cool before replacing the spark plug.
- Clean any dirt or debris around the spark plug with a brush or compressed air.
- Loosen the old spark plug with a socket wrench, turning it counterclockwise.
- Gently thread the new spark plug by hand – take care not to cross-thread it.
- Tighten the spark plug with a socket wrench until snug – but don’t over-tighten.
By following these steps, you’ll ensure you’ve installed the spark plug correctly and avoid any starting issues. Additionally, use a spark plug compatible with your mower model. Check your mower’s manual or ask a pro if you’re unsure. Incorrect spark plugs can harm engine performance and cause more issues.
Remember to inspect and clean spark plugs regularly as part of routine maintenance. This will keep performance optimal and stop starting issues.
Properly Maintain the Lawn Care Equipment
To keep your lawn care equipment running smoothly, maintenance is key. Neglecting to maintain it can lead to performance issues and costly repairs. Follow these steps to stay on top of it:
- Clean equipment after each use. Use a brush or compressed air for hard-to-reach areas.
- Sharpen blades at least once a season or when they seem dull.
- Check the oil level and change it as needed.
- Replace fuel filters regularly.
- Inspect spark plugs for signs of wear or fouling. Replace them if needed.
- Store in a clean and dry area. Use fuel stabilizers or empty fuel tanks before long periods of storage.
By following these steps, you can ensure your lawn care equipment runs efficiently and without breakdowns. Don’t let your lawn mower start a neighborhood rumor – call the professionals instead!
When to Seek Professional Help
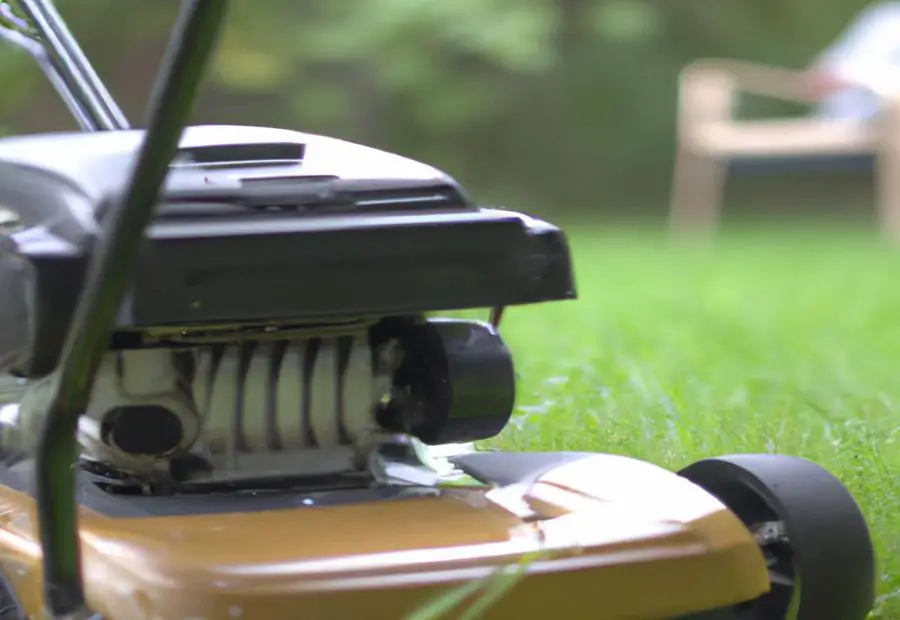
Photo Credits: Gardenerheaven.Com by Jeremy Rodriguez
When trying to start a riding lawn mower, it is wise to seek professional help if all other attempts fail. If the quick fixes don’t work, such as checking the fuel, cleaning spark plugs, or ensuring battery charge, it’s time to call a professional. They have the tools and knowledge to pinpoint and resolve the problem.
Also, if the mower has been recently serviced and still won’t start, it’s a sign that expert help is needed. Servicing should have addressed any issues, so if there’s still a problem, a professional should be consulted.
When looking for help, it’s important to find a reputable provider with experience in repairing riding lawn mowers. That way, users can be sure their mower is in safe hands.
In short, if a riding lawn mower won’t start, professional help is recommended. Choose an experienced service provider to ensure the problem is resolved.
Frequently Asked Questions about Riding Lawn Mower Starting Issues

Photo Credits: Gardenerheaven.Com by Timothy Williams
Starting issues with a riding lawn mower can be a pain. But, there are some typical queries that come up. By understanding these regularly asked questions, you can rapidly spot and fix any starting problems your mower may have.
- One typical query is, “Why won’t my riding lawn mower start?” Factors like a dead battery, a defective ignition switch, or a stopped fuel line could cause this. It’s important to check these parts first to identify the source of the starting problem.
- Another inquiry is, “How do I troubleshoot a riding lawn mower that won’t start?” To get this sorted, you should:
- Look at the battery and ensure it’s fully charged.
- Inspect the ignition switch and wiring for any damage or loose connections
- Check the fuel system for clogs or blockages stopping fuel from reaching the engine.
- A popular question is, “What should I do if my riding lawn mower won’t start after winter?” This is normal and can be caused by old fuel or a carburetor clogged with old fuel. In this case, you should empty the old fuel and put in fresh fuel. Plus, you may need to clean or rebuild the carburetor to make sure fuel flows properly to the engine.
It’s important to note that these are only some of the questions that come up when dealing with starting issues on a riding lawn mower. By understanding these common questions and their answers, you can easily analyze and sort out any problems that arise with your mower’s starting system. This will help guarantee that your mower is always ready to go when you need it.
Conclusion: Get Your Riding Lawn Mower Back in Action
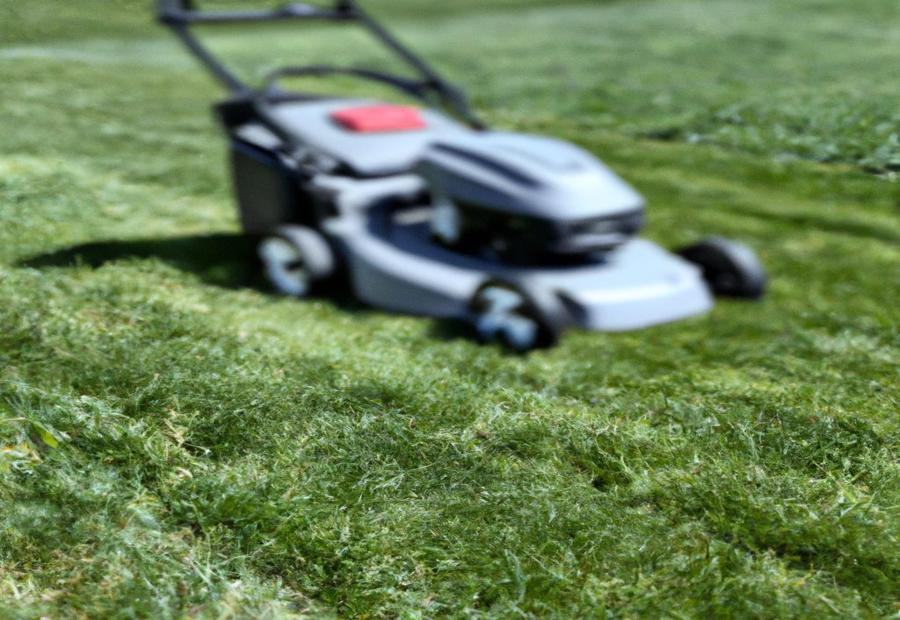
Photo Credits: Gardenerheaven.Com by Carl Roberts
- To get your riding lawn mower back in action, try a few quick fixes. Start with the spark plug. Disconnect the wire, remove the old plug and install a new one.
- Check the air filter, too. Clean or replace it to enhance engine performance.
- Make sure there is enough fuel in the tank.
- Inspect the battery and cables for corrosion or loose connections.
Troubleshoot the mower’s safety switches, ignition switch, starter solenoid and belts. Examine these components to diagnose and resolve any problems.
Maintenance is key. Clean the mower deck, sharpen the blades and lubricate moving parts. Follow a maintenance schedule and address issues promptly. Avoid costly repairs and keep your mower ready for action.
Did you know that riding lawn mowers were first introduced in the 1920s? They revolutionized lawn maintenance! (Reference: ‘Riding Lawn Mower Won’t Start? Discover Quick Fixes to Get it Running!’)
Some Facts About “Riding Lawn Mower Won’t Start? Discover Quick Fixes to Get it Running!”:
- ✅ Lawn mowers not starting can be due to various reasons, but most issues can be fixed easily by DIYers. (Source: Team Research)
- ✅ Common causes of a lawn mower not starting include a clogged air filter, dirty spark plug, damaged safety cable, clogged mower deck, or contaminated gas. (Source: Team Research)
- ✅ To fix a clogged air filter, replace paper filters or clean/replace foam filters after every 25 hours of use. (Source: Team Research)
- ✅ To check the spark plug, disconnect the spark plug wire, remove the spark plug, clean it with brake cleaner if necessary, and reinstall it. (Source: Team Research)
- ✅ Clear the mower deck of debris by tipping the mower over and scraping out clumps of grass. (Source: Team Research)
FAQs about Riding Lawn Mower Won’T Start? Discover Quick Fixes To Get It Running!
Why won’t my riding lawn mower start?
There could be several reasons why your riding lawn mower won’t start. Some common causes include a clogged air filter, a faulty spark plug, a damaged safety cable, a clogged mower deck, or contaminated gas.
How do I fix a clogged air filter on my riding lawn mower?
To fix a clogged air filter, you can either replace paper filters or clean/replace foam filters after every 25 hours of use. Regular maintenance of the air filter can help prevent starting issues.
What should I do if my riding lawn mower’s spark plug is dirty?
If the spark plug is dirty, you can disconnect the spark plug wire, remove the spark plug, clean it with brake cleaner if necessary, and then reinstall it. Ensuring a clean and properly installed spark plug can help with starting the mower.
Why does my riding lawn mower get hot and not start?
A riding lawn mower may get hot and not start due to a clogged air filter or muffler. Dry leaves or grass clippings can get trapped in these parts, causing the engine to overheat. It’s important to clean the air filter regularly to prevent overheating and starting issues.
How can I prevent my riding lawn mower from overheating?
To prevent overheating, it’s important to regularly clean the mower’s air filter and use fresh fuel. Using unleaded gasoline with an octane rating of 87 or less ethanol is recommended. Additionally, checking the blade for looseness or damage and keeping the air vent and fuel cap clean can help prevent overheating.
When should I consider seeking professional repairs for my riding lawn mower?
If you have attempted all DIY fixes and your riding lawn mower still won’t start, it may be best to seek professional help. Signs that indicate the need for professional repairs include black smoke, excessive oil or gas usage, knocking sounds, or vibrating/shaking. A qualified maintenance specialist can diagnose and address any internal engine issues.
