

GardenerHeaven.com is reader-supported. When you buy through links on our site, we may earn an affiliate commission.
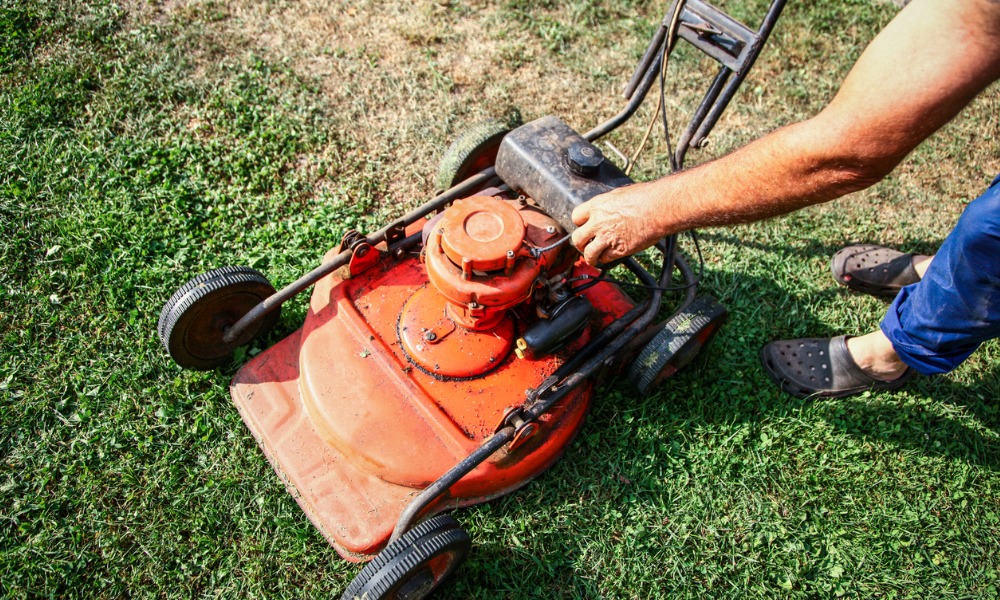
A lawnmower that starts but then stops can be frustrating. In this section, we’ll explore the common causes behind this issue and provide practical fixes for ensuring smooth operation. From an overview of the problem to understanding the importance of a properly running lawnmower, we’ve got you covered. No more struggling with intermittent starting issues – let’s get your lawnmower running at its best!
Overview of the issue

Photo Credits: Gardenerheaven.Com by Robert Miller
Lawnmowers that start and then stop are a common problem. Causes include a dirty carburetor, ignition system issues, or fuel contamination. A clogged air filter can cause a dirty carburetor, a blocked carburetor, or fuel flow problems. A faulty spark plug, ignition coil problems, or electrical system malfunctions may cause ignition system issues. Fuel contamination can be caused by stale gas or fuel-containing contaminants.
To fix this issue, cleaning and replacing are needed. Cleaning the carburetor involves removing it, cleaning the chambers and components, and putting it back on. Also, replacing the air filter is essential. Inspecting and replacing the spark plug should be done regularly. Addressing any ignition system issues is essential for uninterrupted operation. Lastly, fresh fuel and fuel stabilizers should be used to prevent fuel contamination.
Preventing and maintaining the lawnmower is essential. Cleaning and maintenance are needed to avoid a dirty carburetor or clogged air filter. Fresh fuel and fuel stabilizers can prevent fuel contamination. Storing and winterizing protect the lawnmower during periods of non-use.
Importance of smooth operation
Smooth operation is a must for an efficient lawnmower. Abrupt starts and stops can disrupt mowing and cause frustration. This impacts productivity as it takes longer to mow. It’s also bad for lawn care as uneven patches form. This can affect the looks and health of the lawn. The smooth operation also prolongs the lifespan of the lawnmower itself. It reduces wear and tear and prevents breakdowns.
To sum up, smooth operation is important for productivity and lawn care. It saves time and gives a neat appearance. Plus, it increases the life of your lawnmower. Regular maintenance is essential to avoiding starting and stopping issues.
Identifying the Causes
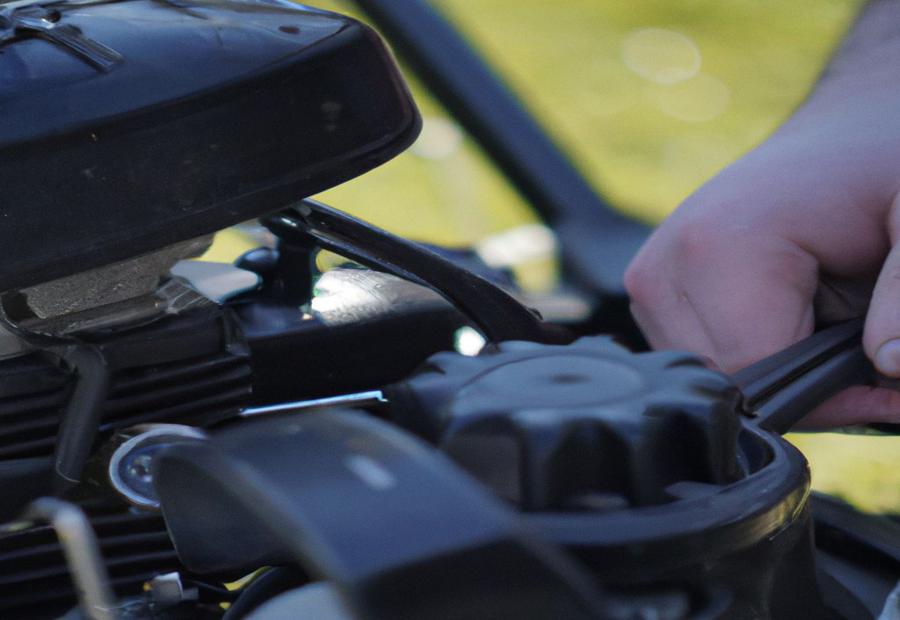
Photo Credits: Gardenerheaven.Com by Arthur Ramirez
Discover the root causes behind your lawnmower’s start-and-stop behavior as we delve into the sub-sections of dirty carburetor, ignition system issues, and fuel contamination. Uncover the facts, figures, and events behind these common problems, ensuring a smooth operation for your lawnmower.
Dirty Carburetor
A dirty carburetor can cause your lawnmower to run rough. Blockages, air filter clogs, and fuel flow issues can all be caused by this. To address it, you can:
- Please take off the carburetor and take it apart.
- Clean each chamber and component.
- Please put it back together and put it back on.
This will make sure any dirt or debris is gone.
Also, check and replace the air filter often. It keeps dirt and debris from getting into the engine.
Inspect and replace the spark plug, too. Faulty spark plugs can cause starting and stopping trouble.
Look out for fuel contamination. Stale gas and contaminants can cause clogging.
To keep your lawnmower running smoothly, do regular cleaning and maintenance. That includes not only the carburetor but also other parts.
Use fresh fuel and add a fuel stabilizer when needed.
Remember to store and winterize your lawnmower correctly, too. This will help it last longer.
By following these steps and practicing proper maintenance, you can avoid issues caused by a dirty carburetor!
Clogged air filter
A clogged air filter can cause issues in a lawnmower’s performance. When it’s dirty, it restricts the airflow to the carburetor and affects combustion. To fix it, five steps must be taken:
- Unscrew the air filter cover.
- Take out the old air filter and check for dirt.
- Place in a new air filter and make sure it fits snugly.
- Secure the air filter cover.
- Start the lawnmower and see if there’s an improvement.
Remember to clean or replace the air filter at least once a season. This will help protect the engine and maintain fuel efficiency. According to a study, a clogged air filter can reduce fuel efficiency by up to 20%.
Blocked carburetor
A blocked carburetor is when the engine’s carburetor is clogged and hinders the fuel-air mixture. This can cause the lawnmower to run and then abruptly stop.
- One explanation is an air filter filled with dirt and debris. This clogs the carburetor’s airflow.
- Particles that enter the carburetor can also cause blockages, disrupting its fuel-air mixing.
- Fuel flow problems can also be a factor. Insufficient fuel or uneven distribution can lead to a blocked carburetor.
Other causes include varnish buildup from old gas or improper storage. To address this issue, clean the carburetor by removing and disassembling it. Also, do regular maintenance, like checking the air filter and spark plugs.
Lawnmower owners can prevent and manage a blocked carburetor by doing these steps and following proper maintenance.
Fuel flow problems
A clogged air filter on a lawnmower restricts the airflow needed for combustion. This can lead to too little fuel mixing with air, causing erratic engine behavior. Debris or old gas residue blocking the carburetor disrupts fuel flow into the combustion chamber. The carburetor is important for delivering the right fuel and running smoothly.
Fuel flow issues can also occur. Stale gas causes blockages in fuel lines or carburetor jets. Contaminated fuel with water or sediment affects fuel flow, leading to engine malfunctioning.
To address these problems, unclog barriers in the system. This means removing and disassembling the carburetor to clean its chambers and components. Replace the air filter regularly to prevent blockage and maintain airflow. Also, inspect and replace a faulty spark plug to ensure efficient fuel-air mixture ignition.
For future fuel flow problems, use fresh gasoline without contaminants or additives that could clog the system. Add a fuel stabilizer when storing your lawnmower for an extended period to preserve fuel quality and prevent corrosion within the carburetor.
Ignition System Issues
Ignition system issues can cause a lawnmower to start and then stop abruptly. These can be traced back to various components. Spark plugs, ignition coil problems, and electrical system issues are all to blame.
To address these, inspect and replace faulty spark plugs. Worn-out or damaged plugs can lead to inconsistent firing, resulting in the mower stalling. Ignition coil malfunctions can disrupt electric current distribution to the spark plugs, causing misfiring and poor engine performance. Electrical system issues, like loose wires or corroded connections, can also disrupt the power supply.
Plus, fuel contamination can clog up fuel lines and carburetors, creating more ignition problems. Clean fuel lines and use fresh fuel or fuel stabilizer additives to prevent this.
A lesson here is to quickly identify and address ignition system issues for optimal performance. Just like a spark plug that’s more stubborn than a teenager refusing to get out of bed in the morning!
Faulty spark plug
A faulty spark plug can be a real headache for lawnmower owners. It is essential for igniting the fuel-air mixture inside the engine cylinder. Faulty spark plugs can cause misfires, sputtering, and even sudden stops.
- Faulty spark plugs with worn-out or damaged electrodes can cause inadequate sparks, leading to poor combustion.
- Excessive carbon buildup on the spark plug can also reduce a spark’s ability to ignite the fuel-air mixture.
- Incorrect gap spacing can also lead to ignition problems.
- Loose or improperly connected spark plug wires can cause irregular firing.
It is essential to take action immediately to address any spark plug issues. Regular inspection and maintenance can help detect any signs of wear or damage. Cleaning or replacing the spark plug will help keep your mower running optimally.
If neglected, a faulty spark plug can cause further damage to other engine components and result in costly repairs. To avoid potential breakdowns and maximize your mower’s performance, follow manufacturer instructions for inspecting and maintaining the spark plug. Don’t let a faulty spark plug get in the way of manicuring your lawn – take action today!
Ignition coil problems
Attending to ignition coil issues is vital for keeping the lawnmower running smoothly. The voltage output from the coil needs checking. Short circuits or breaks in wiring connected to the coil must be mended or replaced. Faulty connections and loose terminals must also be inspected. If the coil is worn-out or damaged, it must be sorted out quickly. Overheating due to too much current should be considered.
When troubleshooting other causes like grimy carburetors or fuel contamination, ignition coil problems shouldn’t be forgotten. Malfunctions in the ignition system can significantly hinder performance and trigger intermittent starting or stalling. Regularly inspecting and maintaining the ignition coil can stop future issues and guarantee long-term satisfactory operation.
Electrical system malfunctions
Inspecting and dealing with electrical system malfunctions is key for a lawnmower to work correctly. The voltage regulator, solenoids, and switches could also cause these issues. It’s essential to check and determine any possible problems in the electrical system for ideal performance.
Ultimately, finding and tending to electrical system malfunctions is key for running a lawnmower. Ignoring these issues can lead to disappointment and loss of productivity while using the equipment.
Consequently, conducting routine maintenance checks and resolving electrical system malfunctions quickly will help ensure the lawnmower runs smoothly and efficiently for an extended period.
Fuel contamination: when harmful gas destroys your lawnmower’s day faster than a suspiciously early lawn gnome uprising.
Fuel Contamination
Fuel contamination is when impurities or unwanted particles are in the fuel of a lawnmower. This can cause issues and stop the lawnmower from working correctly.
There are two primary sources of fuel contamination:
- Stale gas can be an issue, especially if the lawnmower hasn’t been used for a while. It loses its power and makes starting and running difficult.
- Stuff like dirt, water, and debris in the fuel can clog fuel lines and filters, reducing fuel flow and lousy combustion.
To avoid fuel contamination, it’s important to do maintenance on the fuel system. Cleaning and maintenance can help stop these problems. Fresh fuel and a fuel stabilizer can also help keep the fuel clean and powerful.
Stale gas
Stale gas can cause severe problems for your lawnmower. It’s when the gasoline components break down, leading to a weaker fuel that doesn’t power the engine correctly. This can mean:
- Difficulty starting the engine.
- The engine runs rough or stalling often.
- Reduced power output.
- Excessive exhaust emissions.
- Carburetor clogging or other fuel flow issues.
- Increased wear and tear on engine components.
To stop these issues, use up stored fuel and refill with fresh gasoline. Adding fuel stabilizer when storing your lawnmower for extended periods also helps. This way, you’ll keep your lawnmower performing well and lasting longer – no high-octane experiments are needed!
Fuel with contaminants
Stale fuel leads to contaminants, like sediment and varnish, which can block the fuel system. Also, dirt, water, or debris in the fuel can clog the lines and carburetor. To tackle this:
- Refill the tank with fresh, clean fuel. Use high-quality gasoline with no impurities.
- Flush out any visible contaminants with a cleaning solution or by disassembling and cleaning components.
- Inspect and clean the fuel filter or replace it if needed. This will stop impurities from reaching the engine.
Addressing fuel contamination issues will improve current performance and also prevent future problems for a smoother functioning lawnmower.
Troubleshooting and Fixes
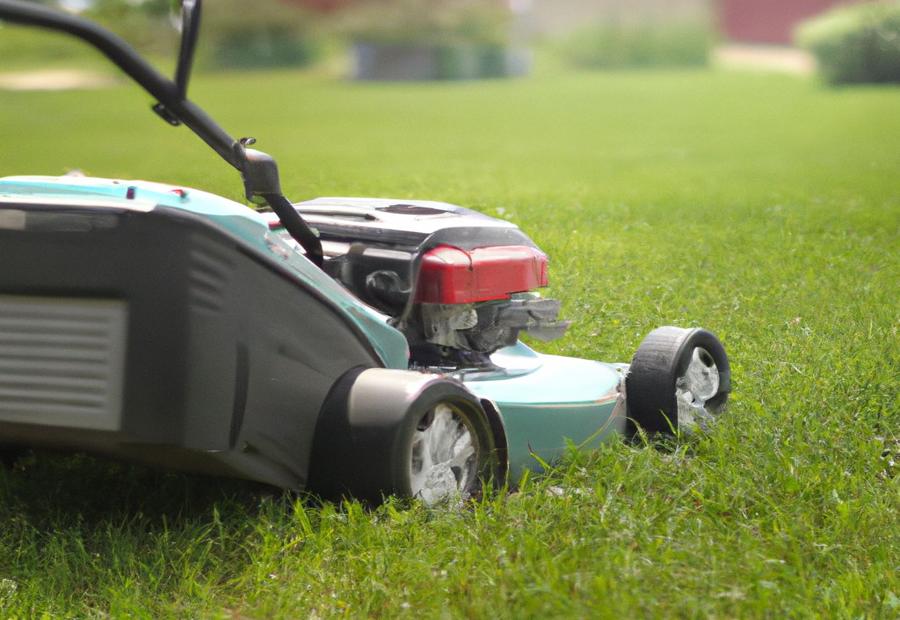
Photo Credits: Gardenerheaven.Com by Anthony Johnson
When your lawnmower starts and abruptly stops, it’s time to troubleshoot and find the fixes for smooth operation. In this section, we will explore various solutions to address the most common causes of this issue. From cleaning the carburetor to checking and replacing the air filter, inspecting and replacing the spark plug, fixing ignition system issues, and addressing fuel contamination, we’ll equip you with the knowledge to diagnose and resolve the problem efficiently. Get ready to have your lawnmower running flawlessly again!
Cleaning the Carburetor
Cleaning the carburetor is a must for smooth lawnmower operation. If it’s dirty, fuel flow can be affected, making the lawnmower start and suddenly stop. Reasons may include a blocked air filter, carburetor, or fuel flow problems.
Here are five steps to clean the carburetor:
- Disconnect fuel lines, then remove and disassemble the carburetor. Pay attention to how the components fit together.
- Clean the chambers and components with a carburetor cleaner or solvent. Make sure the jets and passages are apparent.
- Reassemble and reinstall the carburetor in reverse order. Check connections are secure.
- Inspect and clean/replace the air filter if needed. This helps with proper airflow.
- Check the spark plug for signs of damage or wear. Replace if needed.
Regular cleaning and maintenance of the carburetor and related parts can prevent stalling. Fresh fuel and stabilizers minimize fuel contamination. And proper storage during non-use will protect the carburetor.
The importance of regular maintenance was learned from a lawnmower owner who experienced stalling. After consulting a technician, I thought a dirty carburetor was the problem. Proper cleaning returned the lawnmower to smooth running.
Removing and disassembling the carburetor for cleaning? Grab your gloves – time to get your hands dirty!
Removing and disassembling the carburetor
- To clean your carburetor, start by safely disconnecting the spark plug wire.
- Locate the carburetor on the engine and remove any nearby components that might be blocking access.
- Carefully detach the fuel line, noting any clips or fasteners holding it.
Cleaning the carburetor can help with problems such as a blocked carburetor, a dirty air filter, or fuel flow issues. It also allows for thorough cleaning of the chambers and components.
Don’t forget to check and replace the air filter, inspect and replace the spark plug if needed, and address any ignition system issues. Use fresh fuel and fuel stabilizers to prevent contamination. Plus, storage and winterization will help maintain the efficiency of your lawn mower.
So don’t forget to clean out the butterflies’ vacation home! Regular maintenance and addressing issues promptly means you can enjoy a hassle-free lawn mowing experience.
Cleaning the carburetor chambers and components
To clean the carburetor properly, follow these steps:
- Detach the carburetor: Start by disconnecting the spark plug wire to ensure you’re safe. Then, take care when removing the carburetor from the engine. Remember how it connects so you can put it back together correctly later.
- Clean the chambers: Use a carburetor cleaner or solvent. Spray the float bowl, jets, and other components. Pay special attention to deposits or clogs. A brush or toothbrush can help scrub away grime.
- Clean other parts: While cleaning the chambers, inspect gaskets, diaphragms, needle valves, and springs. These components regulate fuel flow, so they need to be in good condition for smooth operation.
- Reassemble and reinstall: Put the pieces back in their original positions. Ensure all connections are secure before attaching the carburetor to the engine.
It’s important to maintain your lawnmower regularly. This helps stop dirty carburetors and keeps the lawnmower running well and lasting longer. Cleaning the carburetor chambers and components is key to efficient fuel flow, preventing clogging, and smooth operation.
Reassembling and reinstalling the carburetor
To correctly put back together and install the carburetor, follow these steps:
- Start by cautiously taking out and taking apart the carburetor. This might involve unplugging fuel lines, detaching bolts or screws, and separating various parts.
- Clean all the carburetor compartments and components thoroughly. Use a carburetor cleaner or a mix of warm water and soap to clear away any dirt, grime, or remains that may have built up.
- Pay special attention to cleaning the tiny openings and pathways within the carburetor. These can quickly become blocked with particles, influencing their performance.
- After cleaning, start putting back together the carburetor by cautiously placing all the components back in their accurate positions. Make sure everything fits tightly and securely.
- Install the completely assembled carburetor back onto its original location on the lawnmower engine. Be careful to plug back in any fuel lines or other connections that were formerly taken out.
- Check that everything is precisely aligned and connected before switching on the lawnmower. This will aid guarantee that it runs smoothly with no issues.
It’s critical to note that putting back together and installing the carburetor should be done with accuracy and careful attention to detail. Any errors or misalignments can result in additional problems with your lawnmower’s performance.
Plus, always consult your lawnmower’s user manual for particular instructions, or talk to a professional if you’re unsure about any step of this process.
Pro Tip: When reassembling and reinstalling the carburetor, capture pictures or note each step along with related parts or connections’ positions. This will give you a helpful reference for future maintenance or repairs.
Checking and replacing the air filter
The air filter in a lawnmower is essential. It stops dirt, junk, and nasty stuff from getting to the engine. Replacing the filter regularly keeps the lawnmower going well and lasting longer.
- Unscrew or undo clips on the air filter cover.
- Check the filter for dirt or damage. If it’s dirty or clogged, change it.
- Put in a new filter and secure the cover.
Also, use clean hands or gloves when handling and fitting the new filter. This stops more contaminants from getting into the engine.
Regularly changing the air filter means the engine gets enough airflow. This reduces the risk of performance issues like stalling or running poorly. This simple maintenance can help the lawnmower work better and for longer.
Inspecting and replacing the spark plug
Maintaining your lawnmower? A key step is inspecting and replacing the spark plug. For safety, disconnect the spark plug wire from the plug first. Use a spark plug wrench to remove the old spark plug from the engine cylinder, taking care not to damage nearby parts. Check the plug for damage or wear, like worn electrodes or carbon buildup. If so, replace it with a new one compatible with your model. Ensure the gap is at manufacturer specs. When doing maintenance, look out for signs of damage or wear, like erosion or deposits. Doing this can prevent issues due to a faulty plug and give optimal performance.
A personal experience: “My lawnmower kept shutting down after starting. Consulting the manual, I learned spark plug inspection and replacement was important. Following the steps, I replaced the old plug with a new one, and my lawnmower started smoothly again.”
Follow these steps and incorporate spark plug inspection and replacement into your lawnmower maintenance for long-lasting, reliable performance.
Checking and fixing ignition system issues
Checking and fixing ignition system issues can stop your lawnmower from unexpectedly stopping. To ensure smooth operation, look at the spark plug, ignition coil, and electrical system.
- Inspect the spark plug for signs of damage or wear and replace if needed.
- Examine the ignition coil for any malfunction or damage.
- Tackle any loose connections and wiring that may disrupt the flow of electricity.
Moreover, regular maintenance checks should include replacing worn-out ignition system parts. Inspect and repair any issues for smooth mowing with no unexpected shutdowns. Keep your lawnmower running as well as a golf course!
Addressing fuel contamination
Fuel contamination can be a problem for lawnmowers. To avoid this, follow these three steps:
- Replace old gas with fresh fuel.
- Use fuel that has no contaminants, such as dirt, water, or debris.
- Consider adding a fuel stabilizer.
It is also essential to clean and maintain the lawnmower, check other potential causes, and follow proper storage and winterization practices. Using ethanol-free gasoline can also reduce the risk of fuel degradation and contaminant buildup in lawnmowers (Source: Consumer Reports).
Remember to keep your lawnmower happy with these maintenance tips!
Prevention and Maintenance Tips
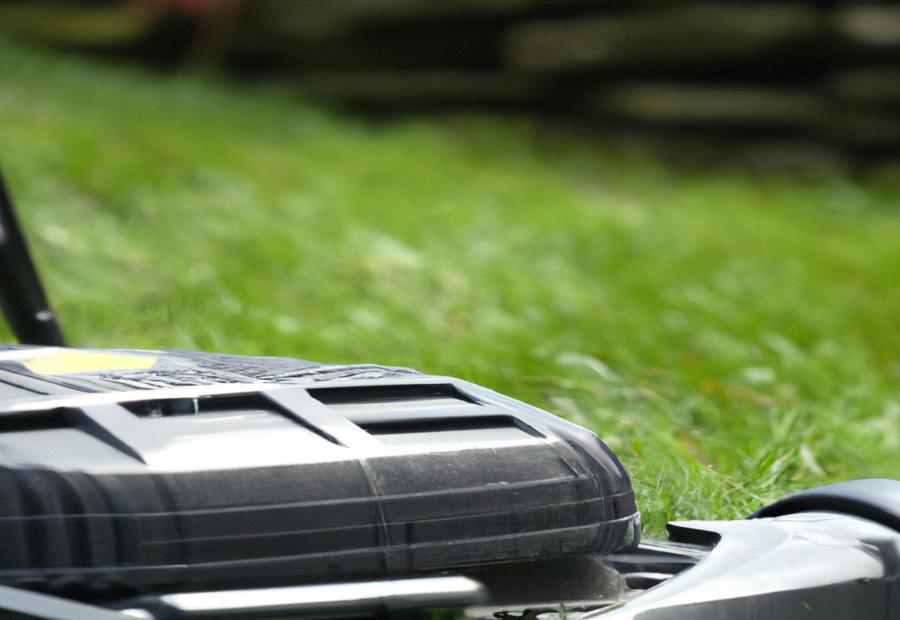
Photo Credits: Gardenerheaven.Com by Randy Rivera
Prevention and maintenance are key to keeping your lawnmower running smoothly. This section’ll explore practical tips to help you avoid common issues and ensure your lawnmower stays in top condition. From regular cleaning and maintenance to using fresh fuel and fuel stabilizer, as well as proper storage and winterization, these tips will help you keep your lawnmower running reliably throughout the year. Get ready to take charge of your lawnmower’s maintenance for hassle-free grass-cutting seasons.
Regular cleaning and maintenance
Time to get your lawnmower in tip-top shape! Here’s how to do it:
- Clean the carburetor. Take it out and dismantle it. Clean the chambers and components, making sure there’s no dirt build-up. Reassemble and reinstall.
- Check and replace the air filter. Inspect it for clogging or debris. Replace if needed so that air can flow to the engine.
- Inspect and replace the spark plug. Look for any signs of wear or damage. If so, replace it for efficient ignition.
- Check for ignition system issues. Faulty spark plugs or ignition coils? Address these pronto to keep the lawnmower running smoothly.
Don’t forget to use fresh fuel and fuel stabilizer to stop contamination and ensure optimal performance. Store it well, especially during winter.
An example of the importance of regular cleaning and maintenance? An owner who didn’t bother with it. Their mower often stalled due to a dirty carburetor and old fuel. After learning proper maintenance and following a routine, they restored their mower’s smooth operation and avoided further issues.
So, get your lawnmower back on track with fresh fuel and fuel stabilizer – and enjoy a flawless mowing experience!
Using fresh fuel and fuel stabilizer
Fresh fuel is essential for the peak performance of your lawnmower. It helps with efficient combustion and stops the buildup of varnish and gum in the carburetor. With a stabilizer, you can store gasoline for longer without worrying about its quality.
It’s essential to follow the manufacturer’s advice on the type and quantity of fuel stabilizer to use. This prevents starting and stopping problems and reduces maintenance.
Using fresh fuel and a stabilizer also improves performance and lengthens the lifespan of components like the carburetor, spark plugs, and ignition coils. It minimizes damage from contaminated or degraded fuel.
Store fresh fuel mixed with a stabilizer in a dedicated container to avoid contamination from other substances. This and proper storage and winterization are vital for keeping your machine running well.
Proper storage and winterization
- Drain the fuel – Empty fuel from the tank to avoid staleness and starting issues.
- Clean the mower – Clear away debris or clippings to avoid corrosion.
- Lubricate moving parts – Lubricate cables and pivot points to prevent rusting.
- Store in a dry location – Store in a shed or garage away from moisture.
- Remove or disconnect the battery – Avoid draining or damage by removing or disconnecting the battery.
- Follow manufacturer’s guidelines – Follow the manufacturer’s instructions for proper storage.
Protect your lawnmower by following these steps. It will ensure longevity and reliable performance. Protect your investment and prevent future repairs or replacements.
Conclusion
Photo Credits: Gardenerheaven.Com by Vincent Brown
Troubleshooting a lawnmower that starts and then stops? Common causes and fixes are easy to spot.
One issue could be a clogged carburetor. Debris and residue can cause blockages. To fix this, clean the carburetor thoroughly.
Another potential problem could be a faulty spark plug. Check the spark plug and replace it if needed.
Lastly, a dirty air filter can restrict airflow and cause the lawnmower to stop. Clean or replace the air filter regularly to prevent this.
Considering these potential causes and making the necessary fixes, you can resolve the issue and keep your lawnmower in excellent condition.
Some Facts About “Lawnmower Starts Then Stops”:
- ✅ One of the most common causes of a lawnmower starting and then stalling is a dirty carburetor. (Source: Team Research)
- ✅ Signs of a dirty carburetor include initial starting but inability to stay running. (Source: Team Research)
- ✅ Cleaning and resetting the carburetor can usually fix the problem. (Source: Team Research)
- ✅ Regular cleaning is recommended to prevent carburetor clogging, especially after storage. (Source: Team Research)
- ✅ Buying a high-quality lawnmower can help prevent clogging issues. (Source: Team Research)
FAQs about Lawnmower Starts Then Stops
Why does my lawnmower start but then die?
A dirty carburetor is the most common cause of a lawnmower starting and then stalling. A dirty carburetor prevents proper air and fuel mixture, causing the engine to sputter and die. Signs of a dirty carburetor include initial starting but inability to stay running. Evaporated gas can gum up the carburetor’s pores, preventing it from functioning correctly. Cleaning and resetting the carburetor can usually fix the problem.
What tools do I need to clean the lawnmower carburetor?
You will need sockets, a ratchet, a gas siphon, a carb cleaner solution, and a fuel treatment solution to clean the lawnmower carburetor.
How do I clean the lawnmower carburetor?
To clean the lawnmower carburetor, you must inspect the air filter, check connections, remove and clean the carburetor, examine the fuel bowl, clean off the rust, and reassemble the carburetor. After reassembling, the lawnmower should be tested to see if the issue is resolved. If the problem persists, it may be necessary to replace the carburetor.
How can I prevent my lawnmower carburetor from getting clogged?
To prevent carburetor clogging, regular cleaning is recommended, especially after storage. Buying a high-quality lawnmower can also help prevent clogging issues.

