

GardenerHeaven.com is reader-supported. When you buy through links on our site, we may earn an affiliate commission.
Accurate measurement of a chainsaw bar is crucial for optimal performance. In this section, we’ll explore the importance of precise measurements and how it directly affects the efficiency and safety of your chainsaw. Delving deeper, we’ll uncover the impact of incorrect measurements on cutting performance and the potential risks involved. Let’s dive in to understand why getting the measurements right is paramount in harnessing the full potential of your chainsaw.
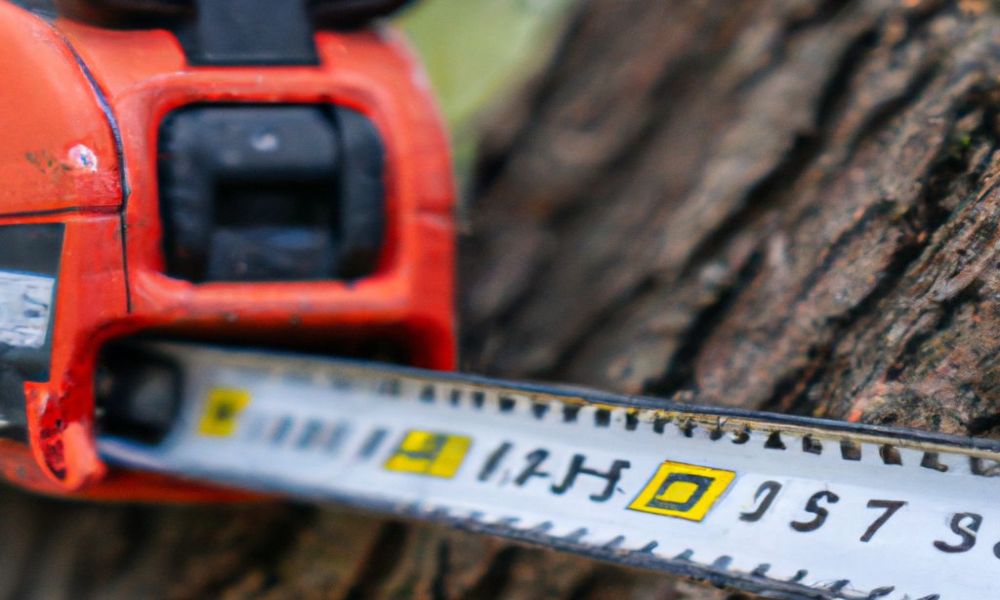
Importance of accurate measurement of a chainsaw bar
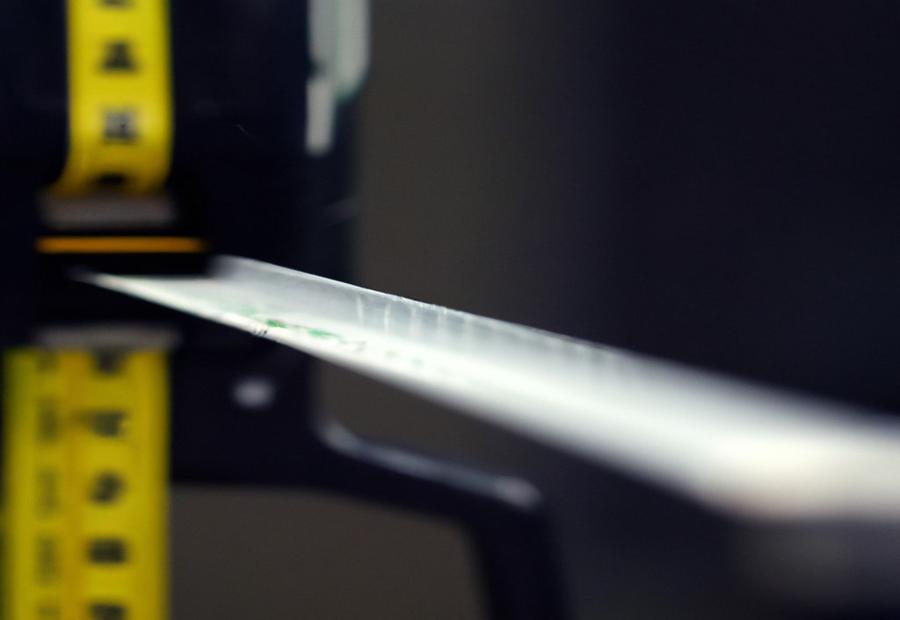
Photo Credits: Gardenerheaven.Com by Lawrence Hall
Measuring a chainsaw bar accurately is essential for optimal performance and safety. The bar, an integral chainsaw part, affects its cutting and true length. By measuring these correctly, you can select the right bar and chain size for your chainsaw, preventing harm and maximizing efficiency.
- To measure the bar accurately, you must follow a step-by-step guide. First, proper preparation is a must. This includes safety precautions and disconnecting the chainsaw. Then, measure the cutting length of the bar with precision. It helps to know common cutting lengths in chainsaws.
- Finding the true length of the chainsaw bar is also vital due to variations in components or design. To do this, understand the difference between cutting and true length, then follow specific steps.
- Also, measure the chain. Please remove it from the chainsaw following recommended procedures. Measure the chain’s pitch and gauge to match the selected bar size. Count the number of drive links on the chain to pick the right chain size.
Incorrect bar and chain sizes can damage the equipment and operator. This may cause poor cutting performance, wear and tear on components, and even safety hazards. So, consult user manuals for specifications regarding suitable sizes for each chainsaw model.
Overview of the chainsaw bar and its components
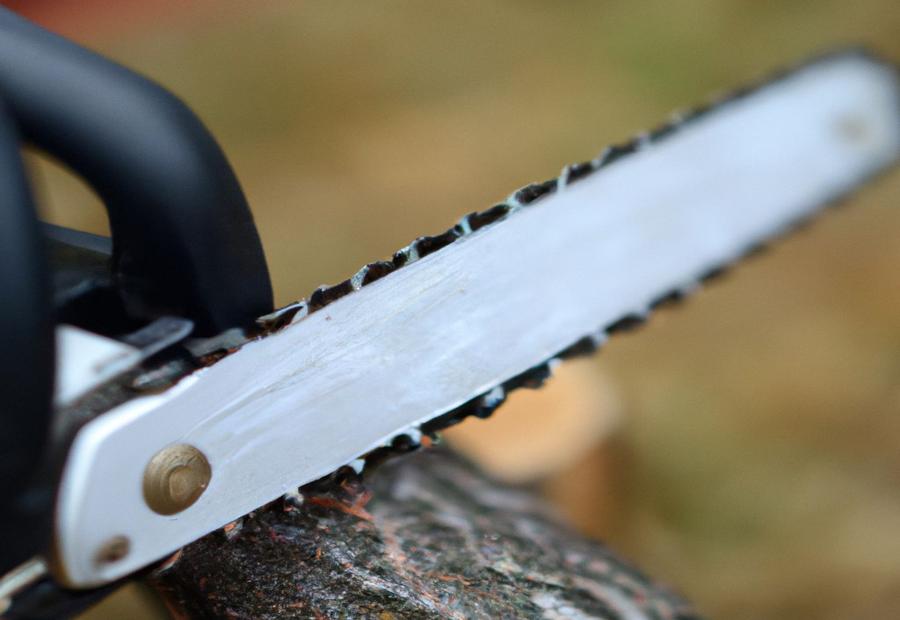
Photo Credits: Gardenerheaven.Com by Robert Lewis
The chainsaw bar is a critical component of this powerful cutting tool. In this section, we will provide an overview of the chainsaw bar and its components, exploring the definition and function of this essential tool. Additionally, we will discuss the different parts that make up a chainsaw bar, shedding light on their roles in ensuring effective and precise cutting. So, let’s dive into the world of chainsaw bars and gain a better understanding of their importance and functionality.
Definition of a chainsaw bar and its function
A chainsaw bar is the part of a chainsaw that supports and guides the cutting chain. It’s key to a safe and efficient cutting job. It guides the chain and houses components like the chain tensioning mechanism, oil delivery system, and sprocket.
To measure it accurately, you need to understand its definition and function. It’s a metal plate with a groove running along it where the saw chain sits. It anchors the chain’s teeth, enabling them to cut efficiently. Without a proper bar, cutting can become unsafe and inefficient.
Measuring the chainsaw bar is important. Differentiate the cutting length from the true length. Cutting length is the part of the bar on which the teeth are engaged. True length includes the cutting length plus any additional protrusion beyond it.
To measure, start by disconnecting the chainsaw from any power source or fuel supply. Then, measure the cutting length from one end of the groove to the other. Then measure the true length from the tip or nose to the farthest end.
Accurately measuring the chainsaw bar helps you use the correct size chain. Using the wrong size can lead to poor cutting performance, kickbacks, decreased efficiency, or damage to the chainsaw and material. Check the user manual or manufacturer’s specifications for the right size.
The chainsaw bar is essential, so get to know it – it’s a Swiss army knife for lumberjacks!
Different parts of a chainsaw bar
A chainsaw bar’s various components are crucial to its performance and function. To ensure optimal performance, one must understand them. A table may help identify each component:
| Component | Description |
|---|---|
| Guide Bar | The main body of the bar. It provides stability and support for the chain. |
| Chain Groove | A track for the chain’s smooth movement. |
| Bar Mount | Attaches the bar to the saw. |
| Sprocket | Drives and controls the chain. |
Knowing the components is important for proper maintenance and replacement. Doing so lets us maintain efficient functioning and longer life for our chainsaws.
Step-by-step guide on how to measure a chainsaw bar

Photo Credits: Gardenerheaven.Com by Christian Rodriguez
Looking to measure a chainsaw bar accurately? This step-by-step guide has got you covered. Discover how to prepare your chainsaw for measurement, measure the cutting length of the bar, determine its true length, and even measure the chain. Get ready to take the guesswork out of measuring your chainsaw bar and ensure optimal performance in your cutting endeavors.
Preparing the chainsaw for measurement
- Prioritize safety – wear protective gear like gloves, goggles, and ear protection.
- Power off or remove the battery from the chainsaw.
- Clear away any obstacles from your workspace.
- Examine the chainsaw bar for any damage or wear. Replace anything broken or bent.
- Clean the bar and chain free of dirt, sawdust, and debris.
- Adjust components according to manufacturer instructions, including chain tension.
Remember: Safety is key! Keep your workspace clear, inspect the chainsaw bar, clean away debris, and adjust components before measuring.
Safety precautions before starting the measurement process
Before measuring a chainsaw bar, safety is essential. Follow these four steps for protection:
- Disconnect the chainsaw from power.
- Wear PPE, such as gloves, safety glasses, and shoes.
- Inspect the chainsaw and its parts for damage or defects.
- Work in a ventilated, well-lit area.
Heed these warnings to keep safe. Also, be aware of details in the user manual. Neglecting safety protocols can be disastrous. Disconnecting the chainsaw is key to avoiding tragedy!
Disconnecting the chainsaw to prevent accidental start
- Turn off the chainsaw. Ensure it’s completely switched off and no power or fuel is connected.
- Remove the spark plug from the engine. This ensures no ignition source is available.
- Engage the chain brake. The chain brake stops the chain from rotating, even if it touches something. This adds an extra layer of protection.
Taking necessary precautions can help avoid risks associated with accidental start-ups. Safety should be a priority when working with power tools like a chainsaw. Even a momentary lapse can have severe consequences.
Measuring the cutting length of the bar
Measuring the cutting length of a chainsaw bar is key for successful performance. Accurate measurement shows users the right chain size for precise cuts.
- Prep the saw: Before measuring, safety is a top priority. Wear protective gear like gloves and goggles—disconnect the power to avoid an accidental start.
- Measure accurately: Find the starting point of the bar on the saw body. Use a measuring tape or ruler from there to the bar’s tip. That’s the cutting length.
- Common lengths: Chainsaws come in various sizes. Cutting lengths range from 12-24 inches or more. Longer bars are for bigger jobs and larger trees.
- The true length refers to the overall length, including protrusions like sprockets or blade guards. Measure one end to the other end to get the true length.
It’s essential to use accurate measurements for both the bar and chain. Otherwise, it can lead to damage and bad performance. An example: someone failed to measure their bar, bought a chain too short, and faced poor cutting performance and more wear on their bar and chain. The lesson? Use accurate measurements to save time, money, and hassle.
Method to measure the cutting length accurately
Accurately measuring the cutting length of a chainsaw bar is key for optimal performance. Here’s how:
- Safety first! Ensure proper safety precautions before the measurement, including protective gear and the chainsaw turning off.
- Next, disconnect it to prevent any accidental start-ups. This is super important for safety.
- Measure the cutting length with a reliable method – one approach is to measure from the bar’s tip to where it enters the body.
- Determine the true length, too – this might be different due to housing and bolts. Measure from where the bar exits or attaches to the saw body.
- Finally, confirm both measurements line up with the manufacturer’s specs.
Measuring these dimensions correctly is essential – finding compatible chain sizes is also important. Read the user manual or specs before replacing any components to avoid potential damage.
Following these steps, users can keep their chainsaws in top condition, maximize longevity, improve cutting precision, reduce safety risks, and promote efficiency.
Common cutting lengths found in chainsaws
Chainsaw bars come in different sizes, so knowing the right cutting length for your task is important. Common lengths include 16 inches, 18 inches, 20 inches, and 24 inches or more for larger jobs.
Don’t choose an overly long bar for a job that doesn’t require it – it can cause strain on the user and reduce efficiency. Measure the bar accurately for best results.
For small-to-medium-sized tasks, a 16-inch bar works great. An 18-inch is ideal for general-purpose use. 20 inches is perfect for thicker trees or larger jobs. And if you’re a professional requiring maximum power and capacity, a 24-inch or longer bar may be necessary.
You’ll get optimal performance and desired outcomes by selecting the correct cutting length. Maximize the potential of your chainsaw by using the right bar size!
Determining the true length of the bar
To work out the real length of the bar, let’s look at what’s involved. Measuring only the cutting length doesn’t give an exact picture of the chainsaw’s size. Measuring from one end of the bar, near where it leaves the chainsaw housing, is essential to exclude any part extending beyond. This will get you an accurate length.
Historically, there were no standard methods for measuring the bar length. But, with technology and safety rules, manufacturers developed standard procedures. This has been a massive help for users when selecting a replacement bar. They don’t have to worry about sacrificing performance or safety.
Difference between the cutting length and the true length
The cutting length and the true length of a chainsaw bar are distinct. The cutting length is the portion used for cutting. The true length is the overall length, including any extra bits. To make it clearer, here is a table:
| Cutting Length | True Length |
|---|---|
| Actual portion used for cutting | Measured from tip to where it exits the chainsaw body, including any protrusions or extensions |
| Measured from tip to where it enters chainsaw body | Measured from tip to where it exits chainsaw body, including any protrusions or extensions |
| Affects chain size | Impacts overall dimensions and balance of the chainsaw |
When measuring a chainsaw bar, remember the cutting length and true length. This will help you choose the right chain size and have optimal performance. No need to worry about ‘true length.’ No need for a measuring tape or shrink ray.
Steps to find the true length of the chainsaw bar
- Measure the cutting length. This part extends from the body and determines how deep it can cut. Use a tape measure or ruler from tip to body.
- Determine the overall length. This includes both cutting length and any portion within the chainsaw body. Refer to the user manual or manufacturer’s specifications.
- Consider any additional factors. For example, some bars may have a sprocket at one end. Consult the user manual or contact the manufacturer for guidance on specific models.
Following these steps, you can find a chainsaw bar’s true length and ensure optimal operation performance.
Measuring the chain
- Extract the chain: Carefully detach the chain from the chainsaw for accurate measurement. This could mean loosening tension screws or releasing tension from the chain tensioning system.
- Note the pitch: Gauge the space between drive links with a ruler or tape measure. Remember this measurement for purchasing a new chain.
- Calibrate the gauge: There are two methods to determine the width of the groove where the cutting teeth sit:
- Use a caliper tool to measure the width of one drive link (measurement A).
- If instructions indicate a coin size that fits snugly, use various coins to find the right match.
- Count the drive links: To accurately buy a new chain, count all of its drive links. These are usually found on one side of each cutting tooth with safety features like depth gauges or tie straps.
- Note any details: Before replacing or buying a new chain, record additional info about the chainsaw model or manufacturer specs.
These measurements and facts will help users select the correct replacement chain and keep their chainsaws in optimal condition.
Procedure to remove the chain from the chainsaw
A particular process must be taken to remove the chain from a chainsaw correctly. This includes taking certain safety steps to stop any unexpected start of the chainsaw. Additionally, getting the chain’s details is vital for finding the right bar and chain sizes, which affects the chainsaw’s performance.
Step-by-step instructions for removing the chain from the chainsaw:
- Disconnecting the chainsaw: Before taking off the chain, it is important to take safety measures and ensure it is not connected to any power source. Do this by disconnecting the spark plug or taking out the battery, depending on the kind of chainsaw.
- Removing the side cover: Discover and remove the chainsaw’s side cover, which usually holds the chain in place. Unscrew or unlatch any fasteners that secure the cover.
- Loosening and taking out the tensioning screw: Once the side cover is removed, look for and loosen the tensioning screw. This helps adjust and maintain the correct tension on the chain during operation. Loosen it to release tension on the chain so it can be removed.
- Taking off the chain: Lift and carefully slide off the chain from the guide bar. Handle it carefully, as chains can be sharp and cause harm if handled mistakenly.
After doing these steps, you have successfully removed your chainsaw’s chain, making it easier to measure its measurements, such as pitch, gauge, and number of drive links.
Getting the right measurements for choosing and using compatible bar and chain sizes. Wrong sizing can cause damage to both your chainsaw and cutting equipment. To avoid such problems, always use your user manual or manufacturer’s recommendations for directions on proper bar lengths and compatible chain types for the best performance.
Step-by-step instructions to measure the chain’s pitch
- Accurately measuring the pitch of your chainsaw chain is essential. To do it right, follow these four steps:
- Step One: Detach the chain from the chainsaw. Disconnect the chainsaw and remove the chain from the bar first.
- Step Two: Measure the gap between three consecutive rivets. Use a ruler or tape measure to measure their distance, not including drive links or ties.
- Step Three: Calculate the average. Add up all three measurements and divide by two. This gives you the pitch.
- Step Four: Record it. Please write down the pitch so that you can reference it for replacement chains or sharpening files.
Don’t forget measuring correctly prevents damage to your chainsaw bar and other components. Plus, it helps ensure optimal performance. So take some time to get the right size today! Then you can enjoy a smooth, safe chainsaw experience.
Methods to determine the gauge of the chain
Determining the gauge of a chainsaw chain is essential. There are various ways to measure it accurately. These include:
- Using a caliper. It provides accurate measurements.
- Using coins. This lets you compare the thickness of the chain with different coins.
- Counting the drive links. Each drive link has a specific size.
Each method has its pros and cons. It depends on personal preference and available resources.
Accurate gauge measurements are important. It helps select compatible parts and ensures optimal performance. Incorrect sizing can cause damage. So it’s vital to measure the gauge properly.
Counting the number of drive links on the chain
- Remove the chain from the chainsaw:
- Switch off the chainsaw and disconnect from power.
- Find the tensioning screw/knob on the side panel and loosen it.
- Use a tool such as a wrench/specialized tool to take it off the guide bar.
- Measure the pitch of the chain:
- Pitch is the distance between 3 consecutive rivets divided by 2.
- Use a ruler/tape measure to measure it accurately.
- Pitches vary from 3/8 inch to 0.404 inches.
- Determine the gauge of the chain:
- The gauge of a drive link is how thick/wide it is.
- Use a caliper tool to measure the thickness of one side of the drive link.
- Or estimate it with common coins (e.g., dime for .043, penny for .050).
Be careful/accurate when counting drive links. Errors can lead to the wrong replacement bar/chain, causing poor performance/damage to both chainsaw/operator.
Importance of using the correct bar and chain sizes
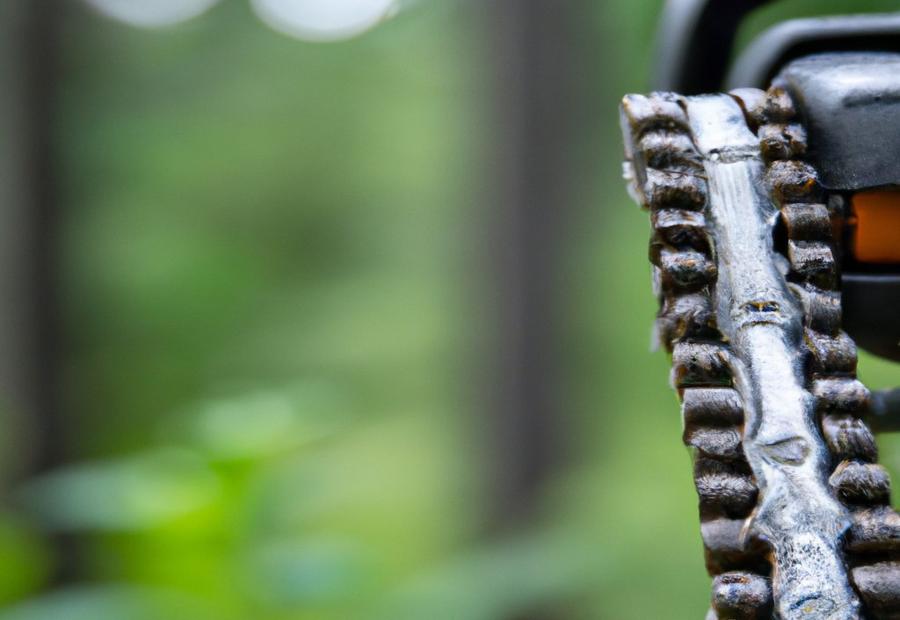
Photo Credits: Gardenerheaven.Com by Stephen Ramirez
Using the correct bar and chain sizes is crucial when using a chainsaw effectively. This section will highlight the importance of accurate measurements and the potential damage caused by incorrect sizes. We recommend checking the user manual for specifications to ensure proper usage. Ensuring the right bar and chain sizes promotes safety and enhances the chainsaw’s performance and longevity.
Potential damage incorrect sizes can cause
Using the wrong size bar for a chainsaw can cause major damage. Too long or short can affect balance and stability, reducing performance and creating safety risks. A bar that is too long puts strain on the engine decreasing cutting efficiency and wearing down the chain. A bar that is too short makes the chain bind and increases kickback, both dangerous for the operator.
Incorrect chain size also has negative consequences. A loose chain can come off, leading to injury and property damage. A tight chain puts excessive strain on the engine, shortening its lifespan.
It is important to read the user manual or manufacturer’s specifications to ensure the bar and chain are the right size and compatible with the model. Regular inspections and maintenance should be done to check for wear and damage.
Using the right size and taking care of it ensures optimal performance and safety and avoids costly repairs. User manual: the best way to avoid chainsaw disaster!
Recommendations for checking the user manual for specifications
Refer to your manufacturer’s guidelines for accurate bar and chain size information. This is a must for proper performance and safety. Here is a 5-step guide for checking the user manual:
- Locate it: Find the manual that came with your chainsaw. It’s usually in the packaging, or you can get it from the manufacturer’s website.
- Identify the specs section: Look for the section that has detailed specs for your model. It’s usually titled “Specifications” or “Technical Data.”
- Look for bar size info: Read about recommended cutting lengths, compatible chain pitch, and gauge sizes.
- Verify compatibility: Make sure the bar and chain sizes match your current setup.
- Follow recommendations: Note any other details in the manual, like max length limits or special considerations for certain applications.
Checking the user manual is key to using the right bar and chain sizes. Doing so will help you avoid issues, maximize your chainsaw’s effectiveness, and stay safe. Double-check everything!
Conclusion

Photo Credits: Gardenerheaven.Com by Bruce Roberts
The conclusion section brings together the key takeaways from the measurement process for a chainsaw bar, highlighting the importance of accurate measurement for optimal chainsaw performance. It emphasizes the significance of precise measurements in avoiding operational issues and maximizing the efficiency and safety of using a chainsaw.
Recap of the measurement process for a chainsaw bar
Measuring a chainsaw bar is important for correct use and best performance. If you follow the guide, you’ll get exact measurements. Here’s a reminder of the essential steps:
- Prep: Before measuring, disconnect the power source and make sure all safety features are on.
- Cut Length: Measure the usable portion of the bar with a ruler or tape. This determines the right chain size.
- True Length: This is the total length of the bar, including any extra bits. Follow the steps to measure it.
- Chain Measurement: Measure the chain’s pitch, gauge, and count drive links. This helps select compatible bars.
Accurate measurements will help you choose the right sizes and avoid any damage.
Importance of accurate measurement for optimal chainsaw performance
Accurate measurement is essential for optimal chainsaw performance. Knowing the bar’s dimensions ensures the chain size is suitable, allowing for efficient cutting and minimizing potential damage. Measuring the cutting length and true length of the bar, along with pitch, gauge, and drive links in the chain, helps users pick the right sizes.
The precise measurement of a chainsaw bar is key to obtaining optimal performance. Its cutting length must be accurately determined to meet the job’s requirements. Different cutting lengths suit different chainsaws, which prevents inefficiency or inadequate cutting.
Understanding the true length of the bar is more than measuring its cutting length. Sprockets or extended noses can also affect the size. Measuring the cutting and true lengths allows users to make informed decisions when selecting a suitable chain.
Measuring the chain is as vital as the bar. Removing it from the chainsaw reveals its pitch, the distance between each driver link. Knowing the gauge or thickness of the chain is essential for proper functioning. Counting the number of drive links ensures that different chainsaw parts are compatible.
Some Facts About How to Measure a Chainsaw Bar
- ✅ The cutting length of a chainsaw bar can be determined by measuring from the tip of the bar to where it enters the body, rounding the measurement to the nearest inch. (Source: wikiHow)
- ✅ The average cutting lengths on most chainsaws are 14, 16, 18, and 20 inches. (Source: wikiHow)
- ✅ The true length of the chainsaw bar is obtained by removing the clutch cover and measuring the bar from end to end. (Source: wikiHow)
- ✅ Standard chainsaw bar lengths range from 8 to 24 inches. (Source: wikiHow)
- ✅ The pitch and gauge of the chain can be determined by measuring the distance between consecutive rivets and the thickness of the drive links, respectively. (Source: wikiHow)
FAQs about How To Measure A Chainsaw Bar
How do I measure the size of a chainsaw bar and chain?
To measure the cutting length of the chainsaw bar, start by unplugging the spark plug wire to prevent the chainsaw from starting. Then, measure from the bar’s tip to where it enters the body and round the measurement to the nearest inch. The cutting length is also referred to as the called length, usable length, or effective length. Standard chainsaw bar lengths range from 8 to 24 inches. Remove it from the saw to measure the chain and lay it on a flat surface. Measure the distance between three consecutive rivets to find the chain’s pitch. Use a caliper to measure the thickness of the drive links to determine the gauge.
What tools do I need to measure the size of a chainsaw bar and chain?
You will need a measuring tape or ruler to measure the bar length, a caliper to measure the chain gauge, and a flat surface to lay the chain on for measurement.
How can I find the true length of a chainsaw bar?
To find the true length of the bar, remove the clutch cover by unscrewing the nuts on the right side of the chainsaw. Pull the cover off and release the bar from the clutch before pulling it off the bolts. Measure the bar from end to end and round the measurement to the nearest inch.
What is the pitch of a chainsaw chain?
The pitch of a chainsaw chain is the distance between three consecutive rivets. To determine the pitch, measure this distance and divide it by 2. The pitch may also be listed on the right side of the chainsaw’s bar.
How do I determine the gauge of a chainsaw chain?
To determine the gauge of a chainsaw chain, use a caliper to measure the thickness of the drive links that fit in the groove on the chainsaw’s bar. The gauge measurement is usually listed on the side of the bar. Alternatively, you can use coins such as a penny, dime, and quarter to find the gauge size by sliding them into the groove and seeing which fits snugly.

