GardenerHeaven.com is reader-supported. When you buy through links on our site, we may earn an affiliate commission.

Leveling the mower deck is crucial for optimal performance and a consistent cut. In this section, we’ll explore the importance of maintaining a level mower deck and the benefits it brings. We’ll also provide an overview of the leveling process, equipping you with the knowledge to keep your Husqvarna mower in top shape. So, let’s dive in and discover how proper deck leveling can revolutionize your mowing experience.
Importance of leveling the mower deck for optimal performance and a consistent cut

Photo Credits: Gardenerheaven.Com by Donald Flores
Leveling the mower deck is of utmost importance for optimal performance and a consistent cut. Blades must be evenly positioned across the cutting width. Otherwise, the deck may become tilted or uneven, creating an inconsistent cut with some areas being cut too low or too high.
Issues arise when the mower deck is not level. Uneven-cutting heights give your lawn an unattractive look, with patches of taller or shorter grass. Plus, an uneven deck can damage blades and other mower components.
A precise leveling process must be followed to achieve desired performance and a consistent cut. Adjusting deck height and positioning blades at the right angle ensures each blade cuts evenly and at the desired height. This results in a beautifully manicured lawn.
Leveling your Husqvarna mower deck enhances overall mower functionality. Proper leveling facilitates efficient grass discharge and reduces clumping underneath. This helps maintain airflow within the deck and prevents any clogs that may affect cutting performance.
Leveling your Husqvarna mower deck is essential for optimal performance and a consistent cut. It not only improves the appearance of your yard but also prolongs the lifespan of your mower. Regularly leveling your mower deck is the key to a perfectly even cut and a more peaceful relationship with your lawn.
Overview of the leveling process and its benefits
Before leveling your Husqvarna mower deck, it’s important to put on safety gear like gloves and glasses. Check tire pressure and lubricate any moving parts too. The leveling process itself involves rerouting the belt, reinstalling springs, adjusting metal tabs, sliding the deck under the machine, and making small adjustments for an even level. Finally, test your mower by starting it and looking for signs of an uneven cut or damage. Repeat the process if needed.
To have optimal performance and a consistent cut, it’s essential to properly level your Husqvarna mower deck. This will also help prolong its lifespan and prevent damage or wear of components. Follow these tips and reap all the benefits of a well-leveled deck!
Preparing for the leveling process

Photo Credits: Gardenerheaven.Com by Jack Moore
Preparing your Husqvarna mower deck for the leveling process? Start by donning essential safety gear like safety glasses and gloves. Ensure optimal performance by checking tire pressure using a tire pressure gauge. Lastly, maintain smooth operation by lubricating any moving parts with the right levels of lubrication. Stay safe and ready with your equipment for a precise and efficient leveling experience.
Putting on safety gear, including safety glasses and gloves
Safety gear is important when working with machinery. Here are three steps to put it on:
- Put on safety glasses to shield your eyes from debris and flying objects. Make sure they fit securely and comfortably.
- Put on gloves to guard hands from sharp edges and moving parts. Choose gloves suitable for the task and fit properly.
- Check manufacturer recommendations for additional safety gear, such as hearing protection or protective clothing.
Prioritize safety when working with your Husqvarna mower deck. Invest in safety glasses and gloves to protect from potential hazards. Getting the right pressure is like giving your mower a breath of fresh air before the grass gets a trim.
Checking the tire pressure with a tire pressure gauge
Regularly checking and maintaining tire pressure on a Husqvarna mower is essential. It helps enhance performance and extends its lifespan. Here’s how:
- Locate the valve stem on each tire. Remove the cap.
- Insert a tire pressure gauge into the valve stem & press firmly to get a reading.
- If the pressure is too low, use an air compressor to add air. If too high, release air by pressing the center pin of the valve stem.
Properly inflated tires provide better traction and maneuverability. Plus, they reduce wear on the tires and strain on other components.
Joe, from Ohio, learned this when he got frustrated with uneven grass lengths after mowing. He invested in a tire pressure gauge & checked the pressure before each mowing session. The difference was amazing! His lawn looked more even and his mower felt smoother to operate. Thanks to this simple maintenance task, Joe now enjoys a consistently flawless cut with his Husqvarna mower.
Lubricating any moving parts with appropriate lubrication levels
Lubricating the mower deck’s moving parts is key for ideal performance and long life. It helps reduce friction, stop wear and tear, and promote smooth deck component operation.
To properly lubricate the mower’s moving parts:
- Spot the parts that need lubrication, such as spindles, pulleys, and axles.
- Clean the surfaces to take away any dirt or debris hindering lubrication.
- Pick the right lubricant for each part. Consult the maker’s instructions or look in the user manual.
- Put a small amount of lubricant on each moving part, with even coverage. Don’t over-lubricate, as it can draw in more dirt and blockage.
- Run the mower for a few minutes after lubrication, so the lubricant spreads across all moving parts.
After reinstalling the spring for leveling, adjust the metal tabs correctly. Align them with the wanted deck height settings. This guarantees a consistent cutting height for your lawn.
Mark ignored proper lubrication of his mower deck’s moving parts for ages. One day, while mowing, he heard strange noises and felt resistance. He inspected it and saw many parts severely worn from no lubrication. He could have saved the high repairs if he had maintained and lubed his Husqvarna mower deck with the right levels of lubricants.
Rerouting the belt

Photo Credits: Gardenerheaven.Com by Zachary Smith
When it comes to rerouting the belt on your Husqvarna mower deck, there are a few essential steps you need to follow. From loosening the screws to releasing the old belt to routing the new belt according to the diagram, we’ll take you through the process step by step. Get ready to tackle this maintenance task and ensure the smooth and efficient operation of your mower.
Loosening the screws to release the old belt
- Homeowners should start by loosening the screws. This will let the old belt slip away from the mower deck.
- The safety pin then needs to come off. That will remove the tension on the idler arm.
- After that, the old belt can be gently taken out.
This step is essential. It preps the mower deck for a new belt. That ensures the old belt is gone and replaced. This gives optimal performance and a consistent cut.
These steps help homeowners maintain their mower deck. Releasing the safety pin and tension is like unlocking a secret door. Have a great mowing session!
Removing the safety pin and releasing the tension on the idler arm
Leveling a Husqvarna mower deck requires special steps. Start by loosening the screws that hold the old belt in place. Then, find the safety pin that secures the idler arm. Carefully remove it to release any tension.
Next, adjust or move the idler arm gently to minimize stress on the mower deck. This ensures a smooth leveling process.
Be sure to wear safety gear, like gloves and safety glasses. Also, lubricate all moving parts with the appropriate lubrication levels.
Note: these instructions are only for Husqvarna mowers. They may not be suitable for other brands or models.
Finally, leveling the mower deck properly results in an even cut across your lawn.
Routing the new belt according to the routing diagram
To fit a new belt on a Husqvarna mower deck, you must first loosen the screws which secure the old belt. Then, remove the safety pin and decrease the tension on the idler arm to detach the old belt.
To install the new belt, refer to the routing diagram and trace the exact path. When finished, your Husqvarna mower deck will be outfitted with the new belt. To ensure optimal performance, be sure to correctly follow the routing diagram for proper placement and tension.
Time to get the metal tabs moving and make your lawn look top-notch!
Reinstalling the spring and moving metal tabs
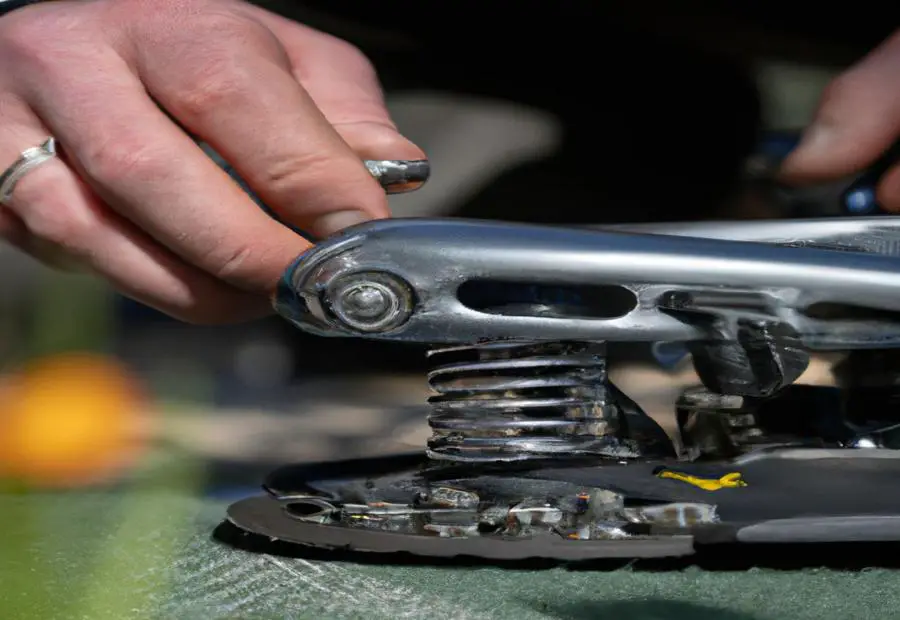
Photo Credits: Gardenerheaven.Com by Jeremy Davis
When reinstalling the spring and moving metal tabs on your Husqvarna mower deck, there are key steps you need to follow. In this section, we’ll cover the process of orienting and stretching the spring to reinstall it, as well as moving the metal tabs to adjust the deck height control. We’ll also discuss the importance of ensuring the spring is securely in place and the metal tabs are adjusted correctly for optimal performance.
Orienting and stretching the spring to reinstall it
Reinstalling a spring? Here’s how:
- Find the spring on the mower deck. It’s usually near the adjuster or arm.
- Take one end of the spring and line it up with its attachment point. Follow the manufacturer’s instructions.
- Grip both ends and slowly stretch the spring. Apply gentle pressure until you’ve reached the desired tension.
- Securely fix the other end of the spring to its corresponding attachment point on the deck.
- Check for any signs of wear or damage on both ends of the spring. Look out for cracks or too much wear, as this could lead to an uneven cut.
- Also, make sure all metal tabs are securely in place. They help control the cutting height during operation.
- By paying attention to these details, you can ensure optimal performance and a consistent cut for your lawn.
Moving the metal tabs to adjust the deck height control
To adjust your Husqvarna mower’s deck height control, follow these steps:
- Find the metal tabs on either side of the deck. These serve as adjustment points.
- Use a tool like pliers or a wrench to loosen any screws or nuts securing them.
- Slide or position the metal tabs to change the deck height. It can affect the length of grass that is cut.
- Note any indicators or markings on the deck to help you adjust the metal tabs accurately.
- Tighten all screws or nuts securely to maintain your chosen deck height. Double-check both metal tabs are adjusted evenly.
Following these steps will help you adjust the deck height control with precision and ease.
However, each mower model may have slight variations. Refer to the owner’s manual for specific instructions.
Adjusting the deck properly boosts cutting performance, reduces engine strain, and prevents scalping or uneven cuts.
Ensuring the spring is securely in place and the metal tabs are adjusted correctly
For optimal performance and a consistent cut, installing the spring and adjusting the metal tabs is crucial. Follow these steps:
- Orient and stretch the spring. To maintain tension and stability, align it with its designated attachment points.
- Adjust the metal tabs. To ensure an even level cut, adjust these to your desired cutting height.
- Double-check secure placement. Visually inspect that both ends of the spring are attached and the tabs are adjusted accurately.
- Reinstall the deck on the right side. Attach the deck while keeping it level with other components.
- Reattach rod and check the belt tension. Secure attachments with a cotter pin. Then, adjust the idler pulley for optimal operation.
Safety precautions are essential before attempting any maintenance. Refer to the owner’s manual for instructions or consult a professional as needed.
Sliding the deck under the machine

Photo Credits: Gardenerheaven.Com by Jason Carter
Sliding the deck under the machine requires precise positioning using the pivot point and ensuring the deck is leveled on a flat surface. This crucial step in leveling a Husqvarna mower deck sets the foundation for optimal performance. By following the step-by-step instructions and tips in this section, you’ll learn how to successfully slide the deck under the machine, guaranteeing evenness and efficiency in your mowing experience.
Positioning the deck under the machine using the pivot point
Positioning decks using the pivot point is crucial for accuracy and efficiency. To make sure each cut is consistent, follow these steps:
- Release any bolts or screws that hold the deck in place.
- Locate the pivot point which is the reference for alignment.
- Move the deck into position underneath the machine but do it carefully.
- Check that both sides of the deck are lined up with precision.
By completing these steps, users can easily and accurately position their mower’s deck under the machine. This process is essential for obtaining an even cut and optimal performance.
It is important to remember that each preceding step should be done correctly before attempting to pivot and position. If all components are not installed and aligned properly, the desired results may not be achieved.
Positioning with pivot points is a common practice in the industry. Manufacturers like Husqvarna use this technique to make installation easier and more reliable. By using designated pivot points, users can be sure of precise alignment and better mowing results.
Level playing fields aren’t just for sports, they’re for mower decks too – meaning an even cut every time!
Leveling the deck on a flat surface to ensure it is even
- Position the deck under the machine using the pivot point. Slide it into place and align correctly.
- Adjust the level of the deck. Use the adjustable bolts or pins located on each side of the machine.
- Check for evenness. Place a level tool across different areas of the deck. The bubble should be centered if the deck is leveled.
- Repeat adjustments if needed. Readjust corners until they are even with the rest of the deck. It may take a few tries.
Level your deck properly to maintain optimal performance and get a consistent cut. No scalping or uneven spots!
Reinstalling the deck on the right side

Photo Credits: Gardenerheaven.Com by Vincent Gonzalez
When it comes to reinstalling the deck on the right side of a Husqvarna mower, there are a few key steps you need to follow. In this section, we’ll explore the process of attaching the deck to the right side of the machine and making small adjustments to ensure the deck is level and even. By the end, you’ll have a clear understanding of how to properly reinstall the deck on your Husqvarna mower for optimal performance.
Attaching the deck to the right side of the machine
- Position the deck: Place the deck under the machine using the pivot point.
- Securely attach: Fasten the deck to the machine with screws or fasteners.
- Check alignment: Follow up with adjustments to make sure the deck is level.
- Maintain stability: Tighten any loose parts and position metal tabs.
- Reattach components: Put back rods or other components removed in the leveling process.
- Final check: Make sure everything is secure and working before testing the mower’s performance.
For optimal results, read the owner’s manual for instructions tailored to your model. Leveling a mower deck is like leveling up in a video game, except it involves less virtual blood!
Making small adjustments to level the deck evenly
-
Attach the deck to the right side of the mower. Use screws or bolts for this.
-
Make small adjustments. Start by adjusting the metal tabs on either side of the deck height control.
-
Use a ruler to check if both sides are at the same distance from the ground.
-
Locate and tighten or loosen the respective metal tab according to your measurements. You may need a wrench or pliers.
-
Recheck both sides and make further adjustments until it’s even.
-
Tighten all screws and bolts.
Note: You may need to make occasional adjustments due to usage and environmental factors. Check and maintain your mower’s level to ensure your lawn looks good after each mowing session.
Reinstalling the rod and checking the belt
Photo Credits: Gardenerheaven.Com by Benjamin Miller
After removing the mower deck, it’s time to focus on reinstalling the rod and checking the belt. In this section, we’ll guide you through the steps of reattaching the rod and securing it with a cotter pin. We’ll also show you how to check the tension of the belt and make any necessary adjustments to the idler pulley. Get ready to bring your Husqvarna mower deck back to optimal functionality.
Reattaching the rod and securing it with a cotter pin
Reattaching the rod and securing it with a cotter pin is key for the proper functioning of your Husqvarna mower deck. Here’s how to do it:
- Remove the cotter pin: Use pliers or a similar tool to carefully take out the cotter pin that secures the rod.
- Reattach the rod: Align the rod correctly and insert it into its original place on the machine.
- Secure with a new cotter pin: Push one end of a new cotter pin through the hole in the rod, making sure it goes through fully. Then, bend both ends of the cotter pin outward.
- Check for proper attachment: Double-check that the rod is securely attached. Make sure there is no movement or looseness in the connection.
Refer to the user manual for specific instructions and components for your model of Husqvarna mower. Remember to align and tighten all connections for stability. And don’t forget to check the belt tension – otherwise your lawn will look wobbly!
Checking the tension of the belt and adjusting the idler pulley if necessary
It’s important to inspect and maintain your Husqvarna mower deck for optimal performance. Here’s how to check the belt tension and adjust the idler pulley:
- Inspect the belt. Look out for wear, damage, cracks, fraying, or looseness that could mean it needs adjusting or replacing.
- Check tension. Use a gauge or your hand to check. It should be slightly deflected when pressed in the middle between two pulleys. Too loose or tight? Adjustment is needed.
- Adjust idler pulley. Refer to the manual for instructions on how to do it.
- Tighten it. Turn the adjustment screw clockwise for small adjustments until the right tension is reached.
- Loosen it. Turn the adjustment screw counterclockwise for small adjustments until the desired tension is hit.
Checking the belt tension and adjusting the idler pulley will help prevent early wear on parts. Plus, it’ll give you an even cut across your lawn for a fresh look. Finally, don’t be afraid to give your mower a second chance. After all, that ex keeps coming back!
Testing and repeating the process if needed

Photo Credits: Gardenerheaven.Com by Matthew Sanchez
When it comes to leveling a Husqvarna mower deck, testing and repeating the process if needed is key. By starting the mower and testing the cutting performance, checking for signs of an uneven cut or visible damage, and being prepared to repeat the leveling process if necessary, you can ensure that your mower deck is perfectly leveled for optimal performance.
Starting the mower and testing the cutting performance
Time to start your mower and check the cutting performance. Follow these six steps for a perfect lawn:
- Engage the parking brake for safety and stability.
- Start the engine with manufacturer instructions. Wear safety glasses and gloves.
- Use the deck height control for an optimal cut.
- Move forward slowly, guiding the mower across the lawn. Notice any unevenness.
- Monitor cutting performance. Check for uneven cuts or damage.
- Test different areas of the lawn for consistent cuts.
Find flaws in your lawn with ‘spot the unevenness’!
Checking for any signs of an uneven cut or visible damage
It’s time to check for any signs of an uneven cut or visible damage. Follow these 6 steps:
- Inspect the mowed area. Look for patches that seem short or long, and scalped or uncut grass.
- Check for missed spots. Walk the mowing path and look for areas you may have missed.
- Examine blade condition. Check for wear, damage, and dullness. Blades should be sharp and free of nicks, bends, or flaws.
- Assess deck condition. Check for cracks, dents, or loose components. Damaged decks can cause irregular cutting patterns.
- Check belt tension. Gently press on it with your finger. It should have some tension but also flex.
- Test mowing quality. Start the mower and observe how it cuts a small section. Watch for signs of unevenness.
Cleaning and maintaining the mower deck is key. Remove debris or clippings, and lubricate moving parts.
Taking a proactive approach and regularly checking for signs of an uneven cut or damage is essential. You’ll get reliable and efficient mowing operations and a consistently high-quality cut.
Historically, lawn mower operators have been aware of the importance of this practice. By identifying and addressing issues early, they’ve been able to prevent further damage and maintain consistent cutting performance.
It’s clear that checking for signs of an uneven cut or visible damage is a critical step. Doing so will ensure optimal performance and quality in Husqvarna mower decks. So level that deck again!
Repeating the leveling process if necessary
- Get ready:
- Safety glasses and gloves.
- Tire pressure with gauge.
- Lube moving parts.
- Reroute belt:
- Loosen screws.
- Remove safety pin.
- Release idler arm tension.
- Follow diagram.
- Reinstall spring:
- Stretch and orient.
- Adjust metal tabs for deck height.
- Securely in place.
- Slide deck under machine:
- Use pivot point.
- Level on flat surface.
- Reinstall right side:
- Secure tightly.
- Make small adjustments.
- Level evenly.
- Reattach rod:
- Secure with cotter pin.
- Check belt tension.
- Adjust idler pulley if needed.
If signs of an uneven cut show up, another round of leveling may be needed. Aim for that butter-on-a-stick cut! Repeat the process until you get it right.
Conclusion
Photo Credits: Gardenerheaven.Com by Bruce Rivera
By ensuring your Husqvarna mower deck is properly leveled, you can enjoy a reliable lawn mower with exceptional performance. In this conclusion, we will recap the importance of leveling a Husqvarna mower deck and highlight the benefits it brings to your lawn maintenance routine. With step-by-step instructions and valuable tips throughout the article, you’ll be equipped with the knowledge to keep your mower deck in the best shape possible. Say goodbye to uneven cuts and hello to a well-maintained, pristine lawn.
Recap of the importance of leveling a Husqvarna mower deck
Leveling your Husqvarna mower deck is essential. This helps the blades stay in the correct position, allowing them to cut the grass at the intended height. It also prevents scalping and uneven cuts. And, it leads to a more professional-looking lawn.
It’s important to keep the deck level. Check and re-level it periodically. Wear and tear, changes in tire pressure, or other adjustments can affect the level.
By keeping the deck level, you get optimal performance. You also maintain a consistent cutting height, for a uniform, manicured look.
Highlighting the benefits of a properly leveled deck for a reliable lawn mower
A leveled deck is essential for a reliable lawn mower. It delivers greater cutting performance, reduces wear and tear, improves maneuverability, and makes operations safer.
Preparing for the process, rerouting belts, reinstalling springs and metal tabs, sliding and attaching the deck under the machine, reattaching rods, checking belt tension, and testing cutting performance are all part of leveling a Husqvarna mower deck. Repeat these steps if needed.
Some Facts About How To Level a Husqvarna Mower Deck: Step-by-Step Instructions and Tips:
- ✅ Leveling a Husqvarna mower deck is important to prevent damage to the lawn and achieve an even cut. (Source: Team Research)
- ✅ Reasons for an unleveled deck include a low or tilted deck, overextended blades, and wet and uneven lawns. (Source: Team Research)
- ✅ The process of leveling a Husqvarna mower deck involves rerouting the belt, loosening screws, adjusting springs, and fine-tuning the height. (Source: Team Research)
- ✅ Regularly checking and leveling the mower deck ensures a consistent and efficient cut, preventing scalping and damage to the lawn. (Source: Team Research)
- ✅ It is recommended to follow step-by-step instructions and consult with a certified service technician for complex adjustments or issues with the mower deck. (Source: Team Research)
FAQs about How To Level A Husqvarna Mower Deck: Step-By-Step Instructions And Tips
How do I level a Husqvarna mower deck?
To level a Husqvarna mower deck, start by preparing the mower by placing it on a flat surface, pressing the brake lever, pushing the clutch upward, and setting the attachment lever to the highest configuration. Follow the routing diagram on the front of the deck to reroute the belt. Loosen the plastic shrouds with a Torx T30 screwdriver to make it easier to get the belts in. Temporarily move metal tabs out of the way to slide the belt behind the pulley. Reinstall the spring that connects the idler arm to the deck and provides tension on the idler pulley. Slide the deck under the machine and secure it in place. Finally, check the belt to ensure it is routed correctly and not twisted.
What tools do I need to level a Husqvarna mower deck?
To level a Husqvarna mower deck, you will need the following tools: adjustable wrenches, measuring tape, a bicycle tire pump or air compressor, an air pressure gauge, a Torx T30 screwdriver, and gloves. These tools will help you disassemble certain parts, adjust the deck height, and check the tire pressure, ensuring that your mower deck is properly leveled.
Why is it important to level a Husqvarna mower deck?
Leveling a Husqvarna mower deck is important to prevent damage to the lawn and ensure an even and consistent cut. An unleveled deck can cause scalping, where the blades cut too deep into the grass, resulting in visible damage. By leveling the deck, you can ensure a uniform cut across the entire lawn, maintaining its health and appearance.
How often should I level a Husqvarna mower deck?
It is recommended to level a Husqvarna mower deck at least once a season and after any forceful bumps into objects. Regularly checking and leveling the deck ensures a smooth and efficient cut and prevents scalping on uneven terrain. By performing this maintenance task regularly, you can keep your lawn in optimal condition.
What are the benefits of leveling a Husqvarna mower deck?
Leveling a Husqvarna mower deck has several benefits, including ensuring an effective and even cutting performance. It helps prevent scalping and visible damage to the lawn by maintaining a consistent cutting height. Additionally, a leveled deck can lead to better energy efficiency and a longer and more durable machine life, reducing the need for frequent repairs or replacements.
Can I level the deck of a Husqvarna Zero Turn mower?
Yes, you can level the deck of a Husqvarna Zero Turn mower. The process involves checking and tightening all deck components before making any adjustments. Small changes, such as raising or lowering one side slightly higher than the other, can help level out the cuts. It is important to recheck everything before finishing up to achieve a greater grass cut.


