

Symptoms Of A Bad Voltage Regulator On A Lawn Mower: Identification And Remedies
GardenerHeaven.com is reader-supported. When you buy through links on our site, we may earn an affiliate commission.
The voltage regulator plays a crucial role in the proper functioning of a lawn mower. In this section, we will explore the importance of the voltage regulator and how it affects the mower’s performance. Understanding the significance of this component will help us identify potential issues and implement the necessary remedies. So, let’s dive into voltage regulation and its impact on your lawn mower’s health and efficiency.
Importance of Voltage Regulator in a Lawn Mower
Photo Credits: Gardenerheaven.Com by Zachary Hall
A voltage regulator is crucial in keeping a lawn mower’s electrical system running correctly. It secures a steady voltage supply to all components, preventing harm from voltage changes. The significance of a voltage regulator in a lawn mower can’t be overstated. It is responsible for sustaining a fixed voltage and avoiding potential damages due to an inconsistent power supply. By controlling the output voltage from the alternator, it makes sure that all electrical components receive the right amount of power.
A signal of a bad voltage regulator is a dead battery. When the regulator fails to regulate the charging process, it can result in either undercharging or overcharging the battery, causing it to fail. Other signs of a damaged voltage regulator include erratic engine performance, flickering or dimming lights, activation of battery light or check engine light, and malfunctioning instrument cluster. To find out if your lawn mower’s voltage regulator works fine, you can use it in two ways. First, you can measure its voltage with a multimeter while the engine runs. Second, you can test the voltage regulator itself using a multimeter.
In case you discover that your lawn mower’s voltage regulator is indeed faulty and needs replacing, here are the steps to follow:
- Gather the tools needed for replacing the old regulator and disconnect any power sources before starting.
- Remove the old regulator by disconnecting any wires or screws.
- Next, install the new voltage regulator by connecting all wires correctly and firmly.
There are a few maintenance tips to avoid voltage regulator problems in your lawn mower and ensure its optimal performance. Don’t overload the battery by not running too many electrical devices at once. Inspect and clean the battery terminals frequently to sustain good electrical connections. Also, avoid extended use of electrical equipment to prevent overheating and potential damage. Knowing the Job of a Voltage Regulator in a Lawn Mower: It’s like a superhero that keeps your mower’s electrical system running smoothly.
Understanding the Function of a Voltage Regulator in a Lawn Mower
Photo Credits: Gardenerheaven.Com by Daniel Davis
The voltage regulator in a lawn mower plays a crucial role in maintaining a stable voltage, ensuring the proper functioning of various electrical components. Understanding its function is essential for identifying and remedying symptoms of a bad voltage regulator. By learning how the voltage regulator helps regulate the electrical output, we can effectively diagnose and address issues related to the mower’s electrical system.
Role of Voltage Regulator in Maintaining Stable Voltage
Voltage regulators serve an essential purpose for lawn mowers. They keep the electrical system’s voltage consistent. This prevents fluctuations and provides a steady energy supply. Regulators also guard delicate electronic components from overcharging or undercharging. This helps them run smoothly and last longer. Lights, engine ignition systems, and instrument clusters are a few of these.
In addition to stable voltage, voltage regulators provide protection. They detect any problems with the charging system and take the necessary action. For instance, they light up the instrument cluster’s warning lights or the check engine light when there’s an issue with the alternator or battery.
The significance of voltage regulators in sustaining stable voltage is undeniable. It ensures electrical components work optimally and guards against damage due to varying voltages. Thus, testing and maintaining the voltage regulator regularly is vital to avoid issues and maximize a lawn mower’s electrical system efficiency.
Common Symptoms of a Bad Voltage Regulator
Discover the telltale signs that indicate a faulty voltage regulator in your lawn mower. This section examines the common symptoms often accompanying a bad voltage regulator, from a dead battery to flickering lights. Stay tuned to learn the warning signals that shouldn’t be ignored if you want to keep your lawn mower running smoothly and efficiently.
Dead Battery
A dead battery in a lawn mower is often linked to a bad voltage regulator. The regulator needs to control the voltage level so the battery can be charged and work properly.
- The battery may not get enough charge if the regulator isn’t doing its job.
- The engine won’t work smoothly if the battery doesn’t have enough power.
- Malfunctioning lighting can also mean a dead battery due to irregular voltage.
- Check engine or battery light can indicate a dead battery due to a faulty voltage regulator.
Considering other causes of these symptoms is essential, but do not ignore a dead battery. If it’s not addressed, more damage may occur. Fixing the regulator immediately is the best way to prevent more extensive repairs or replacements.
Testing for a bad voltage regulator can be done in two ways. First, check the battery’s charge level and monitor it during operations. Second, use a multimeter to test the regulator output for inconsistencies.
To replace a bad voltage regulator:
- Gather the necessary tools.
- Disconnect electrical connections and remove mounting screws.
- Connect wires and reattach mounting screws.
To prevent future issues:
- Don’t overuse the battery.
- Clean battery terminals regularly.
- Don’t run electrical equipment if it’s not necessary.
Erratic Engine Performance
When the voltage regulator in a lawn mower isn’t working, it affects engine performance. This can be surges or slowdowns. It might be hard to start or stall often during use.
An irregular supply of voltage can lead to misfires. This causes an uneven cut and poorer performance.
It’s important to fix issues fast. This will help keep the mower running well and stop other components from getting damaged. Regular maintenance and replacing faulty regulators are a must.
Flickering or Dimming Lights
Your lawn mower’s lights are flickering or dimming? This could be because of the voltage regulator, which helps maintain stable voltage in the mower’s electrical system. Flickering lights may be a sign of:
- A bad voltage regulator with an inconsistent power supply.
- An overloaded battery, where the voltage regulator fails to regulate.
- Corroded or loose wiring connections disrupt electricity flow.
- A faulty alternator or stator not generating enough power.
- Other electrical components having issues at the same time.
It’s a dangerous situation when mower lights flicker. Visibility is reduced, and accidents can happen! So, it’s essential to repair the voltage regulator for optimal performance and safety.
Activation of Battery Light or Check Engine Light
The Battery Light or Check Engine Light act as indicators for the performance of a lawn mower. It suggests issues with the voltage regulator, which affects the voltage supply to the mower’s electrical elements. This triggers users to take steps to solve the problem.
- Dead Battery: The light may show a weak or dead battery, potentially due to a faulty voltage regulator. This can make it hard to start or maintain performance.
- Erratic Engine Performance: A malfunctioning voltage regulator can lead to uneven running, stalling, or surging of the engine.
- Flickering or Dimming Lights: Low or high voltage output from the voltage regulator may cause dimming or flickering lights, affecting visibility and safety.
- Activation of Battery Light or Check Engine Light: Issues with the voltage regulation system, including the voltage regulator, trigger these lights.
- Malfunctioning Instrument Cluster: A faulty voltage regulator may impair other connected systems, resulting in incorrect instrument cluster info.
If not handled, these symptoms could cause more significant electrical issues, damaging the mower’s electrical system. To solve them, diagnosing and replacing the faulty voltage regulator is necessary. Testing with a multimeter or battery can assess the regulator’s functionality. If needed, replace it with a new one.
Malfunctioning Instrument Cluster
The malfunctioning instrument cluster in a lawn mower? Don’t panic! This refers to improper functioning or failure of instruments and gauges on the control panel. This includes the speedometer, fuel gauge, temperature gauge, and more. Resolving this problem ASAP is important, as it can affect the mower’s performance. Here’s how:
- Check for loose connections between the cluster and the main harness.
- Test electrical continuity with a multimeter.
- Inspect the circuit board and replace it if necessary.
- Clean connectors and terminals using an electrical contact cleaner.
- Test each gauge with a specialized gauge tester or voltmeter.
- Replace faulty gauges or components.
Be careful when addressing the cluster. Mishandling can lead to further damage or even electrical hazards. If unsure, ask a professional for help.
Regular maintenance can help prevent issues like this. Check the battery terminals, avoid overloading the electrical system, and pay attention to voltage regulators. These play a crucial role in keeping voltage levels stable. A faulty voltage regulator can cause various symptoms, including a malfunctioning instrument cluster.
Testing the Voltage Regulator on a Lawn Mower
Photo Credits: Gardenerheaven.Com by Justin Wilson
Discover how to test the voltage regulator on a lawn mower in just a few simple steps. From utilizing the battery to testing directly with a multimeter, we’ll explore two methods to help you identify any issues with your voltage regulator. Don’t let a faulty regulator prevent your lawn mower from performing at its best – learn how to diagnose and resolve this problem efficiently.
Method 1: Testing through the Battery
- Turn off the engine and all electricals. This avoids damage.
- Find the battery. It’s usually beneath the seat or in an accessible spot.
- Use a multimeter. Please set it to DC voltage. Connect the red probe to the positive terminal and the black probe to the negative terminal.
- Turn on the multimeter. A full battery should read 12.6 volts. Lower readings suggest a regulator problem.
- Start the engine and rev it up. The voltage should stay relatively stable.
- Replace the voltage regulator if the voltage drops below 12 volts or fluctuates.
In conclusion, test the battery with a multimeter to diagnose regulator issues. No special knowledge or tools are needed.
Method 2: Testing Directly with Multimeter
Test the voltage regulator on your lawn mower directly with a multimeter. It’s a more accurate method than relying on the battery. Here’s a guide:
- Step 1: Set the Multimeter. Select a DC voltage between 12 and 20 volts.
- Step 2: Connect the Multimeter. Connect the black probe to the negative terminal red probe to the positive terminal.
- Step 3: Measure Voltage Output. Turn the mower on and let it idle. Touch the red probe to the alternator’s output wire connector or any exposed wire. Note down the voltage reading.
Compare the reading to the manufacturer’s specified range. If within range, the regulator is functioning correctly. If the reading is outside the range, replace the regulator.
This method gives a direct measurement without relying on battery condition. Replace a bad voltage regulator like a heart transplant – high voltage surgery for a low-maintenance machine.
Steps for Replacing a Bad Voltage Regulator
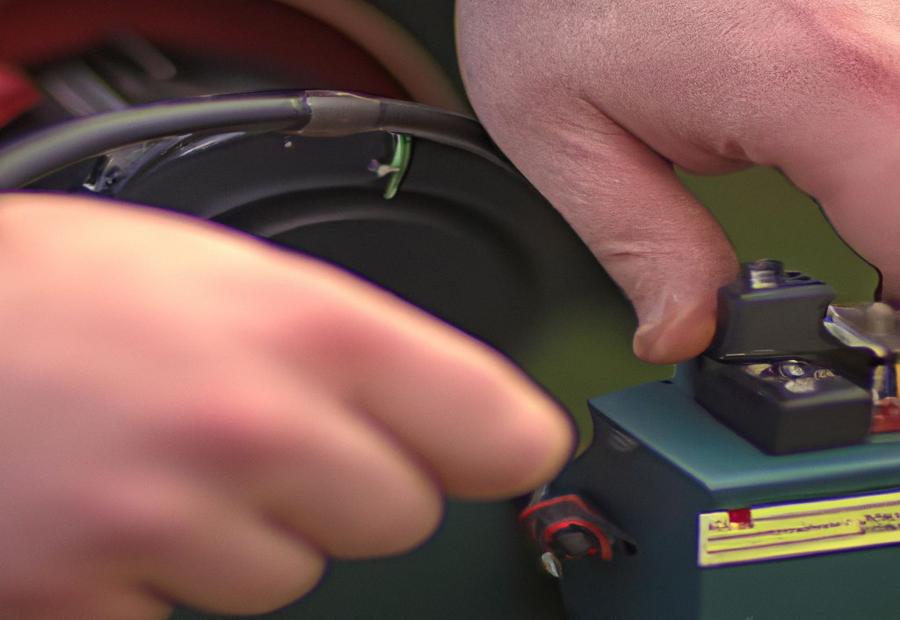
Photo Credits: Gardenerheaven.Com by Billy Allen
Specific steps need to be followed to successfully replace a bad voltage regulator on your lawn mower. In this section, we will cover the necessary tools, the process of removing the old voltage regulator, and finally, how to install the new one. You’ll be well-equipped to tackle this task by understanding these step-by-step instructions.
Gathering the Necessary Tools
A voltage regulator is a must-have for any lawn mower. So, to replace one, you’ll need the following items:
- Multimeter
- Screwdriver
- Pliers
- Wire brush
- Gloves & safety goggles
Step 1: Start by getting a multimeter, which’ll be used to check the voltage regulator.
Step 2: You’ll require a screwdriver to unscrew any fasteners that secure the old regulator.
Step 3: Pliers are necessary for detaching electrical wires connected to the regulator.
Step 4: A wire brush should clean battery terminals before installing the new regulator. This is important, as build-up can affect its performance.
Step 5: Always wear gloves & safety goggles during the replacement process to stay safe.
It’s critical to note that these tools are necessary when replacing a faulty voltage regulator. Having them ready allows for a smooth & successful replacement with no delays or complications.
Removing the Old Voltage Regulator
- Disconnect Battery: Before you begin, unplug the battery as a safety measure and evade electric shocks.
- Spot the Voltage Regulator: It’s usually close to the battery or on the engine. Check your mower’s manual or ask an expert to locate it.
- Disconnect Electric Connections: Be careful when unplugging all electric links connected to the old voltage regulator. Wires or connectors may be attached.
- Unscrew Mounting Screws: Use tools like a screwdriver or wrench to unfasten and remove any mounting screws securing the old voltage regulator.
- Remove Old Voltage Regulator: After the screws are off, carefully pull the old voltage regulator from its spot in the lawn mower.
Following these steps, you can safely and effectively remove the old voltage regulator from your lawn mower without causing damage or injury.
Note: Some lawn mowers could have specific variations or added steps for their model when removing a voltage regulator. Look at your mower’s manual or get help from a pro if you run into trouble.
Installing the New Voltage Regulator
- Gather Tools: Get a wrench, screwdriver, and wire cutter.
- Removing the Old Regulator: Disconnect the battery. Locate the old voltage regulator and remove any screws or connections. Note how the wires are connected.
- Installing New Regulator: Position the new regulator in place, align, and secure it with screws. Avoid damaging wires.
- Connecting Wires: Reconnect wires according to notes. Ensure each wire is securely fastened.
- Testing: Startup mower. Check if everything is functioning normally. Look for signs of engine performance or flickering lights.
- Final Check: Double-check all connections are tight and secure.
Pro Tip: Inspect wiring connections for damage or corrosion—clean or repair to prevent voltage regulator issues and extend lifespan.
Giving your lawn mower a regular check-up can prevent voltage regulator issues like going to therapy!
Maintenance Tips to Prevent Voltage Regulator Issues
Photo Credits: Gardenerheaven.Com by Edward Miller
Preventing voltage regulator issues on your lawn mower is crucial for its efficient performance. This section will discuss maintenance tips that can help you avoid such problems. From understanding the importance of preventing battery overloading to regularly checking and cleaning battery terminals and limiting extended use of electrical equipment, we will provide valuable insights to keep your voltage regulator in top condition. Don’t miss these easy steps to ensure optimum functionality and prolong the lifespan of your lawn mower.
Avoid Overloading the Battery
Don’t overload your lawn mower battery! It could lead to costly damage. Here’s a 4-step guide for avoiding overload:
- Limit power usage. Prioritize essential components & avoid running multiple power-hungry accessories at once.
- Use battery-saving modes. Modern lawn mowers often have them, so take advantage!
- Optimize charging cycles. Charge the battery according to the manufacturer’s instructions.
- Perform regular maintenance. Clean the battery terminals regularly to keep optimal contact.
Neglecting these steps can damage the battery, the voltage regulator, and other electrical components. Avoiding overload will help protect your equipment & minimize expenses. So, keep those battery terminals clean & happy mowing!
Regularly Check and Clean Battery Terminals
A regular check-up and cleaning of the battery terminals in a lawn mower is essential. This will keep optimal performance and avoid electrical troubles. Cleaning the battery terminals will guarantee consistent power delivery.
To check and clean your lawn mower’s battery terminals, adhere to these six easy steps:
- Disconnect the negative (black) battery cable. This keeps away any accidental electrical discharge when working on the terminals.
- Inspect for any signs of corrosion or build-up. Corrosion can obstruct the flow of electricity and affect the lawn mower’s performance.
- If you see corrosion, make a solution of baking soda and water. Apply this to the affected areas with a brush or sponge. Baking soda neutralizes acidic corrosion and helps with its removal.
- Scrub the terminals carefully until all corrosion is gone. Be careful not to damage or bend the terminal posts.
- After cleaning, rinse off the residue with clean water. Make sure no baking soda is left on the terminals.
- Connect the negative (black) battery cable securely to the terminal post. Make sure there’s good contact.
Checking and cleaning your lawn mower’s battery terminals prevents loss of power due to corrosion build-up. It guarantees efficient power transfer throughout the lawn mower’s electrical system.
Following these measures regularly can stop future voltage regulator issues connected to poor electrical connections. This preserves optimal performance for your lawn mower.
Avoid Extended Use of Electrical Equipment
Avoid extended use of electrical equipment to prevent issues with the voltage regulator on a lawn mower. Excessive or continuous use can strain the voltage regulator and cause malfunctions and damage.
Follow these steps to help prevent problems:
- Limit use: Don’t keep electrical devices running for long if not necessary. This will reduce strain on the regulator and let it work optimally.
- Use sparingly: Only use electrical devices when necessary. Prolonged use will damage the regulator and reduce its performance.
- Implement usage breaks: When using electrical equipment for an extended period, take breaks to avoid overloading the regulator. This gives it time to cool down and prevents damage.
- Choose manual tools: Use manual tools instead of electrical equipment when possible. This reduces strain and saves energy.
- Monitor usage time: Track how long you use electrical equipment on your lawn mower. This helps you adjust and avoid overloading the regulator.
- Follow manufacturer guidelines: Refer to the manufacturer’s instructions regarding usage limits for specific electrical equipment in your lawn mower. This will maintain the optimal functioning of the equipment and its regulator.
By following these steps, you can avoid putting stress on the voltage regulator and minimize the risk of malfunctions and damage.
Conclusion
Photo Credits: Gardenerheaven.Com by Wayne Taylor
A bad voltage regulator on a lawn mower can cause problems like erratic engine running, dimmed headlights, and even complete power loss. This can be unpleasant for people who need lawn mowers to keep their lawns in shape. Thankfully, there are solutions.
First, diagnose the issue by inspecting the voltage regulator and looking for any signs of damage or wear. Also, test the voltage output of the regulator to get more information. If the output is inconsistent or lower than recommended, replace the regulator.
Replace the voltage regulator by disconnecting the old one and putting in a new one. Ensure it is compatible with the lawn mower model to avoid any issues. Follow the manufacturer’s instructions and guidelines for correct installation.
Regular maintenance can help prevent problems with the regulator. Clean the lawn mower, check and replace the spark plugs, and keep the battery in good condition. These steps can extend the regulator’s lifespan and reduce the chance of issues.
Some Facts About Symptoms of a Bad Voltage Regulator on a Lawn Mower: Identification and Remedies:
- ✅ A bad voltage regulator on a lawn mower can cause the battery to not charge properly, resulting in an overcharged or undercharged battery. (Source: https://lawnask.com/symptoms-of-a-bad-voltage-regulator-on-a-lawn-mower/)
- ✅ Other symptoms of a bad voltage regulator include the mower running at a constant voltage regardless of throttle position, the voltage regulator getting very hot, and non-ideal voltage readings during tests. (Source: https://lawnask.com/symptoms-of-a-bad-voltage-regulator-on-a-lawn-mower/)
- ✅ The voltage regulator is responsible for regulating the voltage output of the charging system, ensuring that the battery receives the correct charge. (Source: https://lawnask.com/symptoms-of-a-bad-voltage-regulator-on-a-lawn-mower/)
- ✅ The location of the voltage regulator may vary in different makes and models of lawn mowers, but it is typically situated on or near the engine. (Source: https://lawnask.com/symptoms-of-a-bad-voltage-regulator-on-a-lawn-mower/)
- ✅ The charging system of a lawn mower consists of an alternator or generator, which generates electricity as the engine runs. (Source: https://lawnask.com/symptoms-of-a-bad-voltage-regulator-on-a-lawn-mower/)
FAQs about Symptoms Of A Bad Voltage Regulator
What are the symptoms of a bad voltage regulator on a lawn mower?
Answer: Prominent symptoms of a bad voltage regulator on a lawn mower include a dead battery, erratic engine performance, flickering or dimming lights, activation of the battery light or check engine light, and a malfunctioning instrument cluster.
How can I identify a faulty voltage regulator on my lawn mower?
Answer: You can identify a faulty voltage regulator on your lawn mower by checking for non-ideal voltage readings during tests, observing the voltage regulator getting very hot, and noticing that the mower runs at a constant voltage regardless of throttle position.
What can cause a lawn mower’s voltage regulator to fail?
Answer: Common causes of voltage regulator failure in lawn mowers include a bad stator or a lack of solid ground. Additionally, damaged ground wire, corroded battery terminals, loose battery connection, and overheating of electrical components can contribute to voltage regulator failure.
Can a bad voltage regulator on a lawn mower cause battery-related problems?
Answer: A bad voltage regulator on a lawn mower can cause battery-related problems such as an overcharged or undercharged battery, resulting in a drain within a day or a battery that does not charge properly.
What is the cost of replacing a voltage regulator on a lawn mower?
Answer: The cost of replacing a voltage regulator on a lawn mower can vary, but on average, the part can cost between $30 to $100, and labor costs can range from $50 to $150, depending on the specific model and complexity of the replacement.
Should I attempt to test or replace the voltage regulator on my lawn mower myself?
Answer: Testing or replacing the voltage regulator on your own is not recommended, as it can affect engine performance and be a safety hazard. It is advised to contact a professional mechanic if you notice any symptoms of a bad voltage regulator to ensure it is properly diagnosed and serviced.

